In his dreams!!
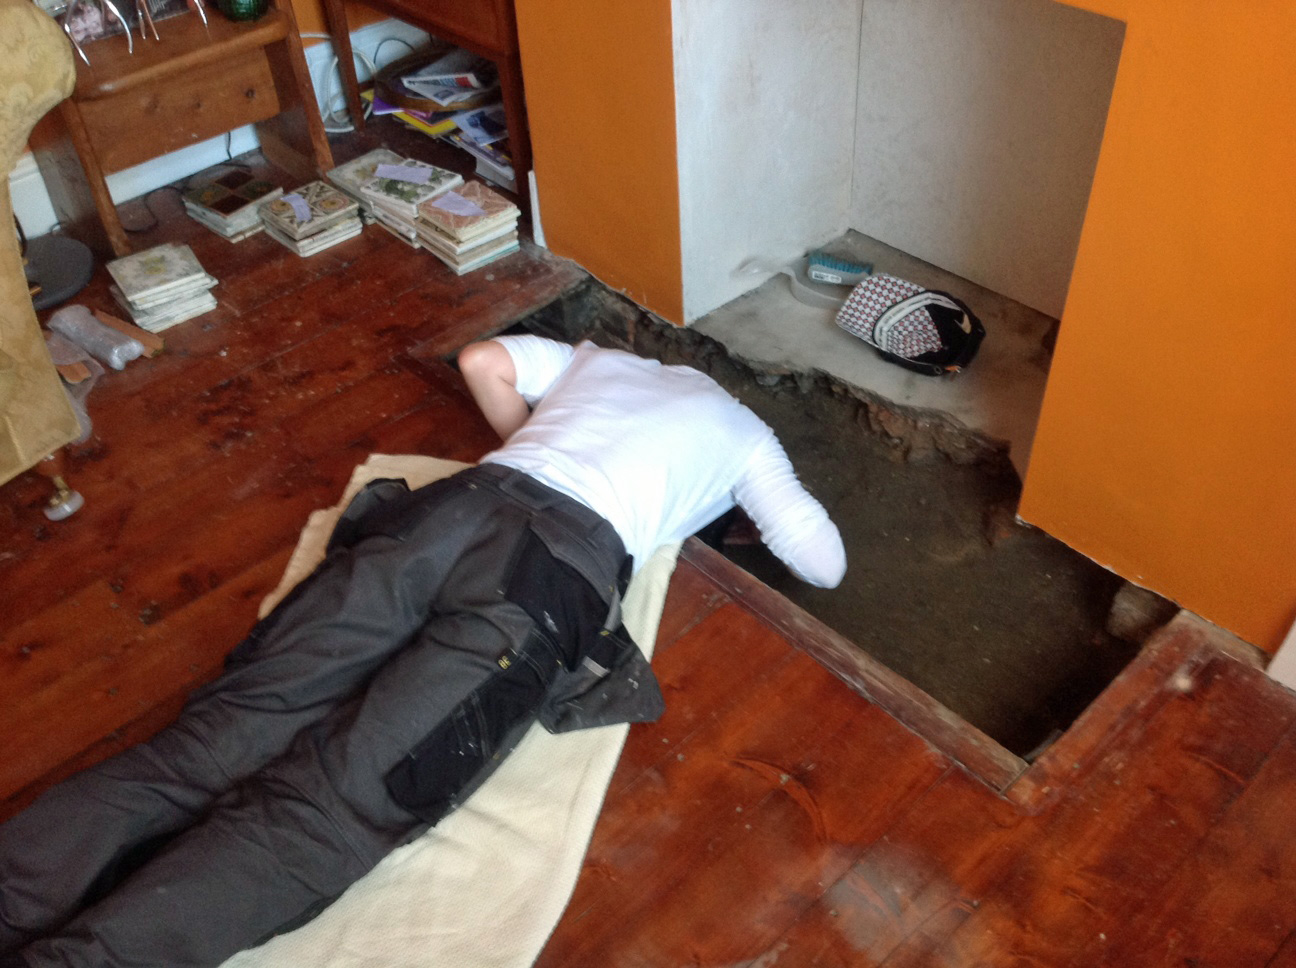
Yup, this is how I spent lunchtime, torch shining, baseball cap off and head down a sub-floor. Hard to believe it started with the below image, our client’s idea of hearth perfection…..
 So. How come I ended up shovelling five bags of damp earth and rubble? Our client had asked a tiler to create the above and as soon as he lifted some of their slate tiles to replace with reclaimed beauties like the ones above, he found a very damp hearth and ran a mile as he didn’t have a clue how to deal with it. As we were sorting some building work in the client’s bar, she asked if we’d take a look – not knowing I’m the Damp Queen 😉
Mr M took up the tiles and got cracking with the hammer….

We got stuck in. Working out what to do, why to do it and how to make it possible to create a fabulous fireplace from this soggy hearth.
I was worried about the timbers beneath the floorboards, i.e. the joists which hold up the floor. If the hearth was so damp, what was going on below? In properties like this one, a turn of the century 2 bed city mid-terrace, raised ground levels externally often cause ventilation issues, current high water tables through extreme weather conditions, failure of original damp proof course etc – it’s all about What Happens Below.
Yes, our client could’ve just tiled the hearth but sensibly, she wanted to check out the cause of the damp. If you own a house, you need to care for it. If you see a symptom of illness, do a bit of investigation. It’s your householder duty!

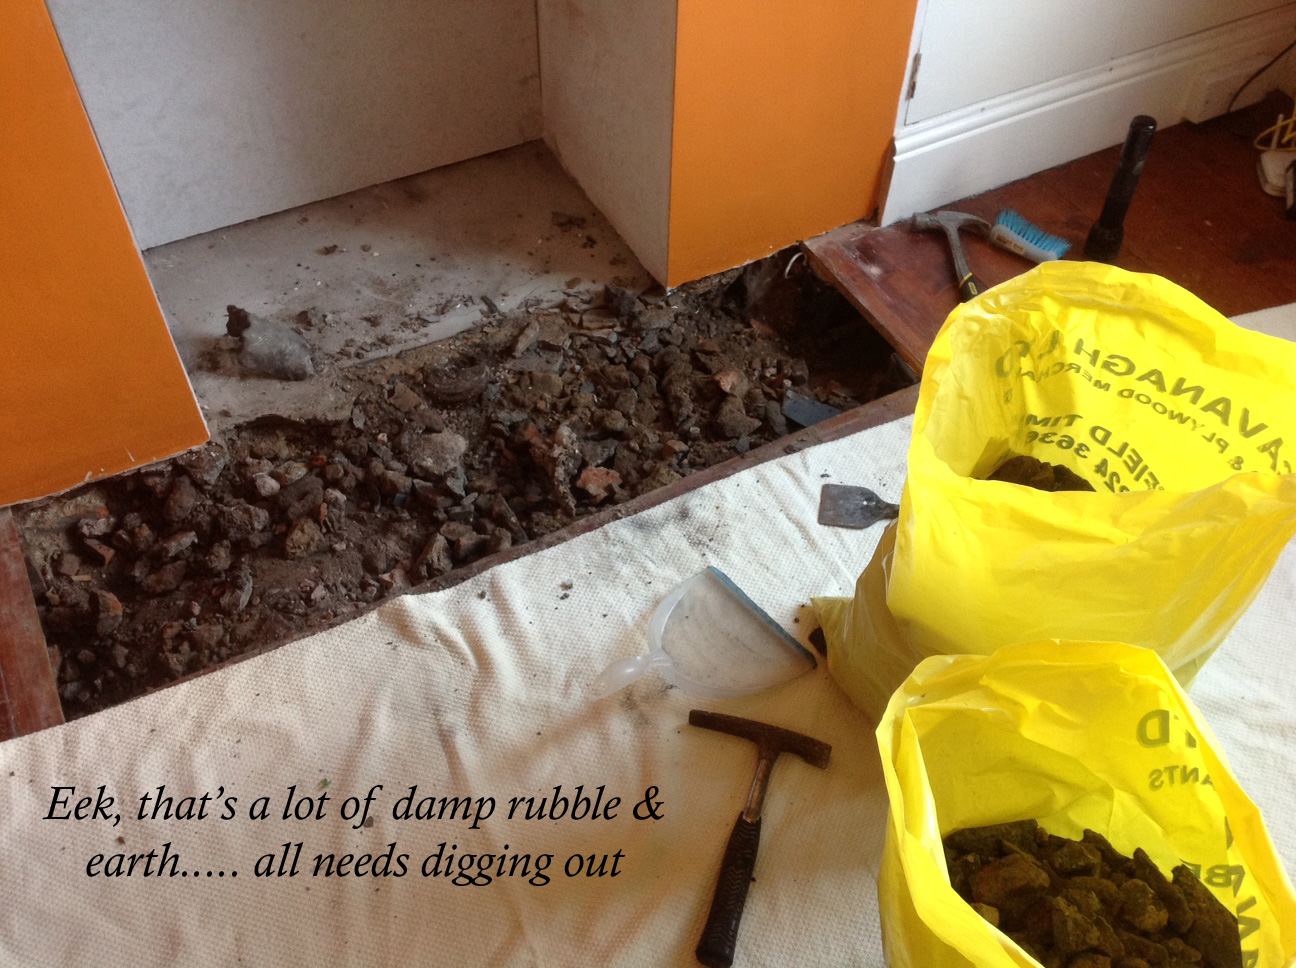
As we shovelled out bag after bag, it became clear that the joists to the right of the hearth had previously been replaced, as you can see above. The new ends had been wrapped in protective plastic (though not the preferable dpc membrane). Half a job though, the new ends had been reinserted into damp earth and the original contractors hadn’t bothered to protect the joists to the left of the hearth. We made sure the joist ends to the left and the full length joist to the front of the hearth was exposed and had good air flow around them. The joists to the left hadn’t suffered any substantive decay, so….. the outlook was good and I was pleased for the client – very little work required!

Diagnosis: Leave the hearth opened up for few days to air the joist ends and treat ends with preservative. As there’s already decent sub-floor ventilation, shutter off main hearth section & cement, leaving the front section clear. Use marine board to board the hearth section. Then tile!
Major H&S Risk Assessment: Spiders from sub-floor emerge and scare the bejeez out of arachnophobic client.

Hi – this is lovely – where did the corner cream dado tiles come from? I’ve tried sourcing these but having no luck
thanks c
The client sourced the corner tiles from EBay, definitely, but I don’t have a company name. Good luck sourcing!
Where did the patterned tiles come from please?
Hi Vicky, they were antique tile collected by the client. Watch out for a new post in early 2017 about how to source fireplace tiles x
Hi , just come across this link – noticed the feature fireplace and hearth
I actually installed this feature including the hearth with the cream edge tile /stove Dovre 250 in Ivory enamel
Whalley Range / Victoria rd
http://www.stove-installer.co.uk David OBrien
just had my fireplace opened up skimmed and it was fine for a month, suddenly green mold inside on the back/external wall. HELP what should I do
Hi there, I’d love to help but it’s very hard to say without seeing the fireplace. Dark / black mould might indicate a problem of internal moisture in the house condensing on a cold external wall. Might be an idea to get some advice from your plasterer / a good local builder or damp specialist. x
Hiya its green mould and it wiped off easily but not sure how long it will take before it returns…
Hi Julie, the usual reason for this is that the wall is a cold spot, with little ventilation, so it is attracting condensation. You could try getting a sheet of insulated plasterboard & cutting down a piece to overboarding this area. The insulated rear (polystyrene) of the new board ensures this ‘wall’ is warm, so it no longer attracts moist air from the room. Also try and ventilate to room more, leave doors open to increase air flow, dry less clothes in there? Guesswork tho, as I haven’t been in your house! X
Hi we are wanting to remove our concrete Hearth. We love in a old house so have raised floor boards but we are not sure exactly what we are going to find under it though all I can see before tampering with it is soft rubble can I ask how I would support the floor boards once we have removed it. Thanks
Hi Kelly, the concrete hearth should be a separate entity to the floorboards and so removing it shouldn’t affect the boards really. When the old broken hearth is removed you should be able to either re-fill with concrete or self levelling compound or if it’s really bad, recreate a hearth using supporting bricks and 18mm plywood so that you can tile on top. Hope that helps! Sian x