 I knew it wouldn’t be long before someone claimed my newly upholstered Parker Knoll – now named Mr Portier – but I thought it’d be Mr M, not her nibs! That didn’t take long #fiveminutes 🙂
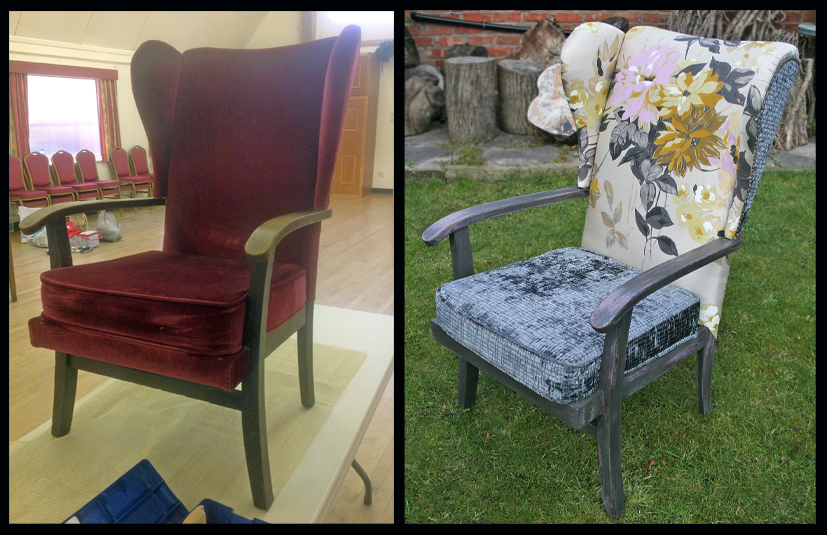
All finished now and I’m so happy with my first ever wingback chair, freshly painted, waxed and upholstered. It’s taken me about two months all in, but that’s only a couple of hours every Monday so not bad really. I LOVE IT!! Everything from the floral silk called Portier in Willow, to the deep charcoal Castellani fabric in Graphite, the lavender Emile over grey Graphite Chalk Paint to the antique gold upholstery tacks found on Ebay.

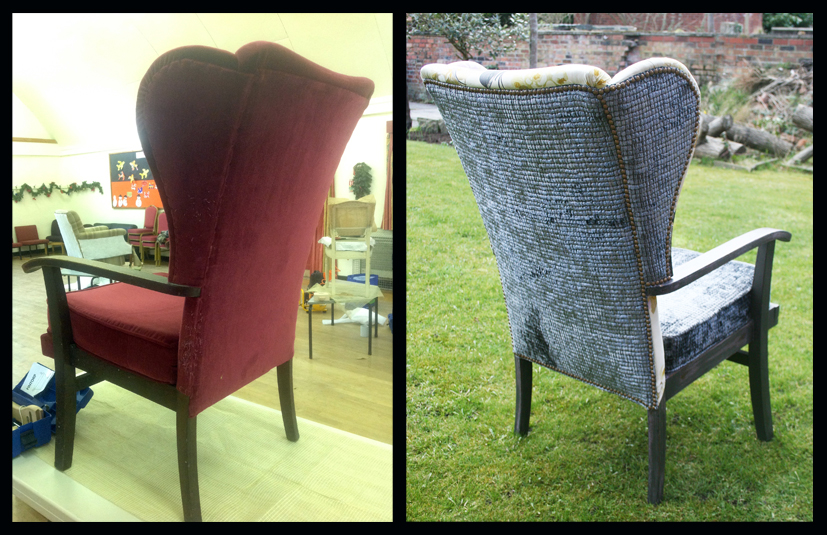
 If you love the shape of a chair or piece of furniture, don’t be put off by the existing fabric or colour of timber – everything can be changed to suit your taste. Just look what Mr Portier looked like when I found it in a scruffy Lancashire second hand shop and believe me, it was very whiffy too!
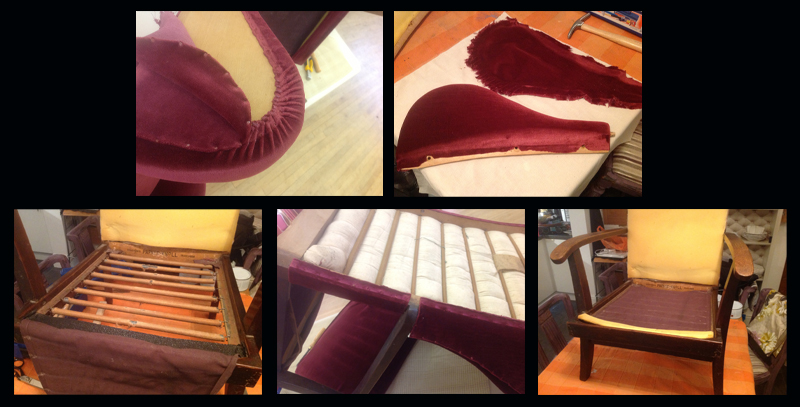
 This is a little visual taster of the steps and processes. First I took him apart, documenting with my phone the stages and how everything fitted together. This was a great tip from my tutor, because then, when you’re putting your chair back together, you don’t get the stages mixed up or in the wrong order whilst you’re still learning. It was fascinating peeling back the layers and seeing how the chair was originally made.
Then I put him back together again, with a LOT of help from Andrea at Plush Upholstery… what a patient lady she is. It’s a good job ’cause I’m so determined to do everything myself and such a perfectionist. ‘Sian,’ she’d say calmly, ‘you won’t see that bit’ as I fretted over a loose thread or wonky staple. Don’t even get me started on the air-powered staple gun – I WANT ONE!
I truly didn’t realise the hard work, time and effort which goes into upholstery or re-upholstery It’s such a skill and takes such time, I look at full time artisans from a completely different perspective now. The stages below were just a few of the ones Mr Portier and I went through, along with zillions of staples and much cursing. Let you into a secret though, I didn’t do the seat cushion, I am RUBBISH with a sewing machine. Know thy skillset people and stick to it 😉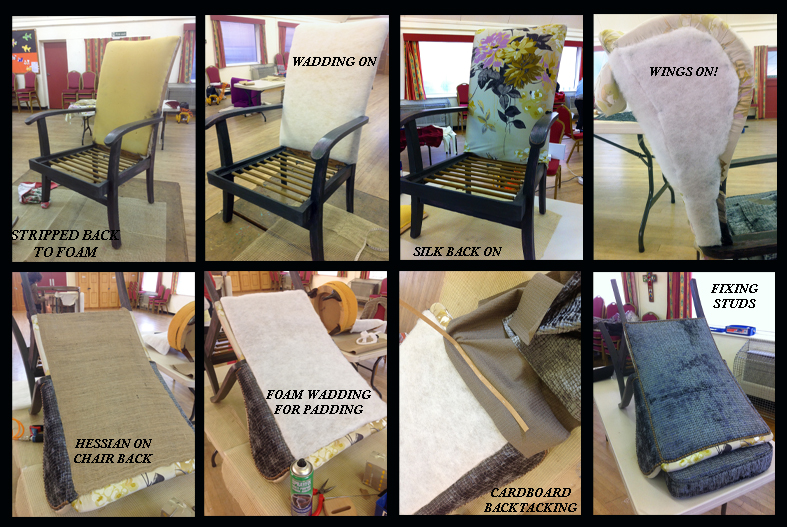 What do you think, thumbs up or down?
Next project please! 🙂


Not easy upholstering – you did a fabulous job and I love the tip to photo document the deconstruct. It is a real accomplishment – love how it looks now.
Thanks Jen, it was such a lovely chair to work on – just have to find the next one now!!
Just found your blog through looking at revamping parker knolls – yours is beautiful. Did you keep the original foam, or did you replace it? I’m doing a parker knoll and have been documenting it on my blog. The foam isn’t in bad nick, but not sure whether to replace it due to fire regulations etc. What did you do? Mandy at mytwelfthchair.wordpress.com
Hi Mandy, Thank you!
I kept the original but it was sort of padding sewn into fabric, rather than foam. If you’re selling the chair you need to adhere to fire regs, but if it’s just for you there’s no legal obligation, as far as I’m aware. Sian x
Just stumbled across this post as I want to *try* and re-upholster a Parker Knoll for our lounge. Love your chair! Such an inspiration!!
I love it too, had lots of help from Andrea on my upholstery course. Good luck with yours x
Love this, could you give me an idea of how much material you needed please, as I have two chairs to recover, thanks
Hi Vanessa, for a Parker Knoll of that size 3m should do it if you use all the same fabric. Or you could mix it up a bit like I did on this one! Good luck with your projects x
It’s a fab finished chair for someone doing their first ever parkerknoll! 🙂
Thanks Jane, hopefully when our refurb gets finished I’ll be doing some more!
Sian, the floral pattern and extra wing-thing is fab! Given me inspiration to tackle a parkerknoll in our garage.
Thanks so much! And I’m delighted about inspiring you to tackle yours, go for it :))))