
 I’m still getting together the full space interior shots for the Splendid Sausage, but I thought I’d share one of the personalised ideas I came up with to make their place different and unique. The menu changes fairly frequently with new combos and toppings, and we didn’t want standard floor to ceiling metal hanging system but something more colourful and fun, so I decided to make one and there it is above!
A padded board allows new pages to be pinned onto the front whenever the need arises, eliminates messy bluetack and ensures an eye-catching, colourful look against the natural OSB background. An inexpensive way for a new restaurant to walk the bespoke path and get a personalised menu board.
Here’s how:
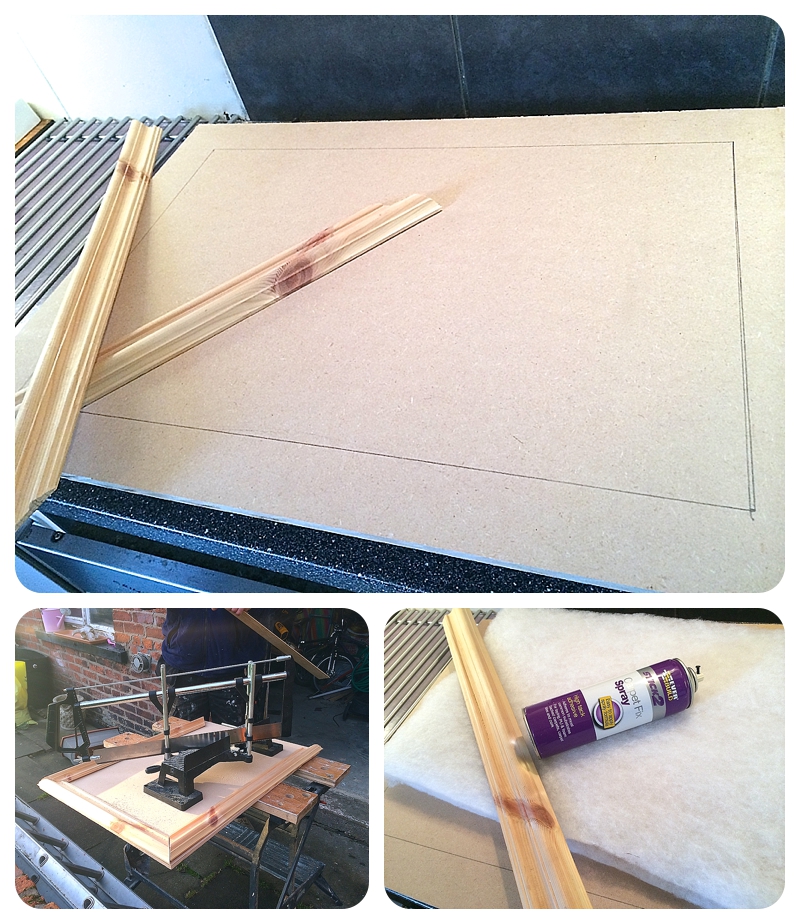
- Measure and decide on the size for the overall board and cut the MDF to size (you can get B&Q or your local timber merchants to do this for you).
- Chose your style of architrave (arc). The minimum total length you’ll need is the perimeter measurement as this is the outer size of your corners.
- Paint or varnish the arc it’s chosen finish before fixing in place so paint etc doesn’t get onto the finished fabric. Touch ups and slight filling over nails can be done carefully afterwards but make sure the edges are done before fixing in place, unless you’re an incredibly accurate painter 😉
- We cut ours using a professional compound mitre saw but you can just as easily use a standard DIY mitre saw & mitre box- this is a great blog post if you’ve never used one.
- When you do your mitre cuts, consider adding a cm or so to each end so that the arc overhangs the MDF. This allows a little rebate which looks neater when the board is viewed from the side.
- Put the arcs in place without fixing them and draw a pencil line to mark out where the material is going to go, then cut the wadding to that size. How plump you make your padding is entirely up to you, I used two layers of 1/2 inch wadding and spray glued it in place.
- Cut the finishing fabric to approximately the same size as the full MDF board. Place over the wadding, adjusting if there’s a pattern or stripes etc, imagine your board is a clock and staple into place at 12, 3, 6 and 9 o’clock, approximately 1 cm past the pencil line towards the edge of the MDF
- Don’t pull your fabric so tight that it looks like it’s straining but also not too loose either. It should just sit nicely over the padding. Test the look by placing your arc in place without fixing down, to make sure you’re happy.
- Finish stapling all around the fabric neatly and carefully, never coming within the pencil line as you don’t want staples to be seen – that’s a complete no no.
- I fixed my arcs in place using thin nails, a hammer and mini nail punch, but if you have a nail gun, that would be ideal. I filled gaps / over heads with a little wood filler but soft filler would work just as well, then touched up using my chosen gold paint finish.
- Finally I added two hooks to the top to allow the board to be lifted off if necessary and ensure it was always straight #tip

Really happy with how it looks in situ and it’s unlike any other menu board I’ve seen! Of course you could choose a totally different fabric and paint for your frame to create your own look, maybe for opening times in a shop or offers in a garden centre. Easy when you know how eh? 😉

Leave a comment