
Woop woop! After timbers, breathable membrane, laths and slates comes the final step in making a reclaimed roof water-tight… sitting the ridge tiles (RTs) on the very top and sealing all the gaps. If you look at the image above on the right, the long navy blue gap you can see to the front is the ridge where the two roof pitches meet and that is where the RTs sit, often overlapping to stop any water getting into your roof space. Sounds simple right? Don’t you believe it!
Not only was I driving all over the place searching reclamation yards with one of our original RTs in the boot to compare colour, length and style but I also went clutching a protractor to measure the inside angle to make sure it’d sit properly on the roof as some roofs are steeper than others so the angles vary. You don’t want to buy a car load of tiles only to find they wobble or don’t sit perfectly. Not so much of an issue with standard new builds if your builder is buying new RTs but essential when the reclaimed path is trodden for an old roof. Ours were 120* which seemed to be fairly standard.
 I struck totally lucky and found a pallet load of blue collared (overlapping) RTs moreorless exactly the same as the ones we already have. As the garage, utility and all four dormers are new, that’s about 65 tiles needed at 490mm each. On Ebay some were priced at £8-9 each plus delivery, but I found these at £4 – over the moon! Plus I could see and check them, always a bonus and they came from a local building meaning a tick for our carbon footprint.
We were very conscientious today, Karcher-ing them down thoroughly and giving them a good rub & scrub with Cif to get all the green slime and pigeon muck off. No poo on my new roof thank you very much.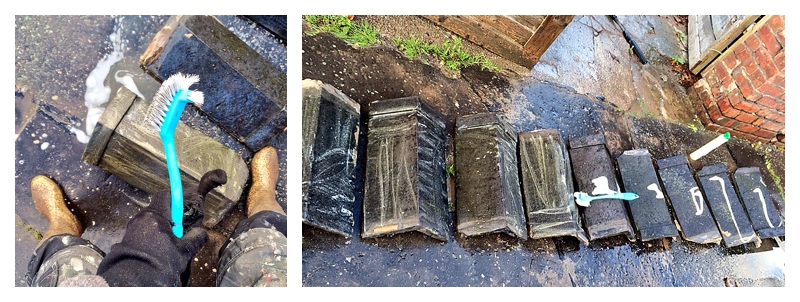 Another consideration is colour and these images below show it is possible to mix up different styles and have grey slates with terracotta red ridge tiles. There seem to be a lot more red decorative RTs out there so I’d have had more choice on style, but I decided I preferred to have our ridges the same colour as the roof. Just a personal preference, you might not agree!
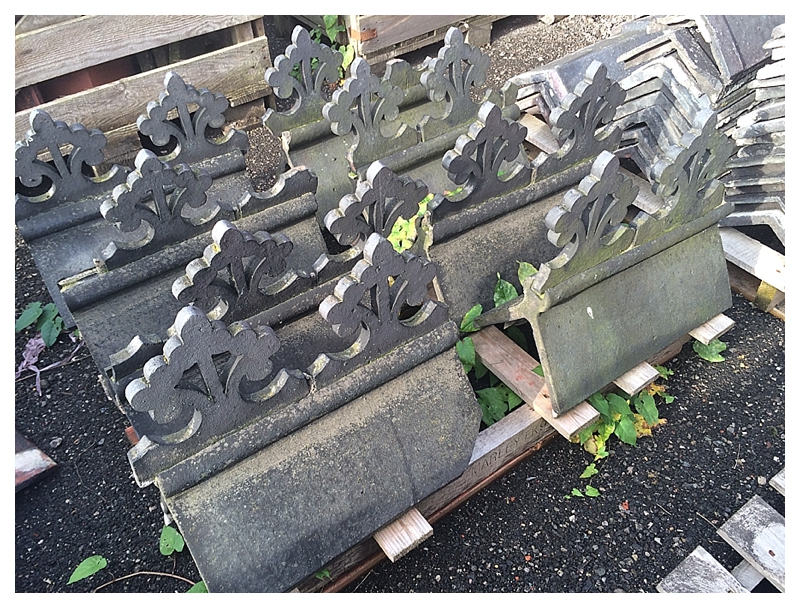
 I can’t tell you how much I was tempted by these ones below I saw at one of the yards. How gorgeous are they? So expensive in comparison to our original blue collared ones though and also there were only these eight somewhat damaged ones left. They’re so pretty, I’m still wondering what they looked like on their original roof. They simply don’t make such decorative roofing products for ‘normal’ houses now, how sad that it doesn’t exist anymore.
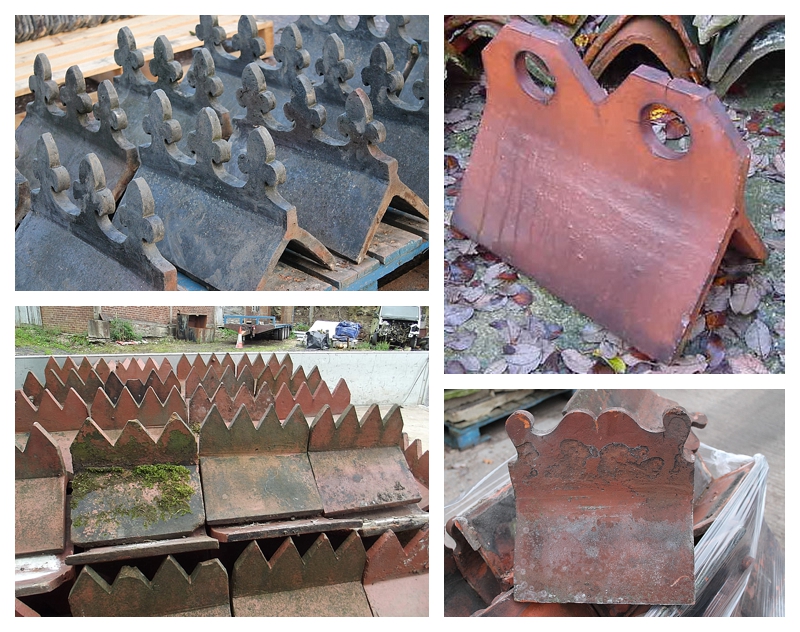
If you’re thinking about a new roof, or a revamp of your old one, maybe think about incorporating some decorative reclaimed ridge tiles yourself? Here’s some I saw on my travels and online for your inspiration 🙂

 Later this week I’ll be doing a technical blog on a great product, recommended to me by a self builder contact on Twitter, which is going to ensure my ridge tiles stay on for many, many years to come. I’ll also be adding dye to our mortar to ensure they don’t look like these blinking awful ones I saw on Google images today. I would KILL the person who pointed my roof like this!!


They’re all absolutely beautiful!! Why don’t we build houses with this sort of detailing anymore?? This is why I love old properties x
Great work! I have just finished the build of a stone gothic cottage (www.overthewaterx2.blogspot.co.uk) and came across the same problems trying to find ridge tiles and chimney pots. I had both tiles and pot made for me (west meon pottery) expensive but worth it. The 8 ornamental tiles shown are worth buying just to put away for copying in future…what yard where they in? Thanks.
Where can you buy the metal ridge cap that is decorative?
I’ve always bought terracotta / non metal ones Shannon – then they don’t corrode x
I’m in Ireland looking for scroll ridge tiles to match ones I have already, 4 on each 18 inch ridge tile