
Well, that’s a seriously big job ticked off for two rooms! The original plan was for builders to take up the all the floor boards of the living and dining room, hoist up the joists, re-build the internal leaves of brick work and re-secure the full timber floor, but with it being the type of back-breaking work most builders now avoid or charge the earth for, it’s been preventing downstairs from moving forward. Nothing else for it but to DIY eh and I’m pretty bloody proud of him mostly and me partly for finishing such a massive job.
It is possible to do jobs like this as a DIY project as long as you’re prepared to get stuck in and dirty. Here are some of my tops tips from me….
Invest in some knee pads. Kneeling in subfloors to clean rubble away hurts, especially when you kneel on the sharp pointy bits of brick! Wear gloves (not rubber ones but thin DIY cloth ones), especially when getting your hands inside wall cavities at the joist pockets to clean out the dried cement and rubble which causes damp to rise up the walls through the blocked cavities. Using a small old paint brush, brush out all the dust and grit towards you & the sub-floor, not into the cavity. Clean the joist pocket of old mortar and make sure the surrounding bricks are secure with new cement / mortar before re-poistioning your joists ends.
We had to literally re-build the walls around the joist pockets the walls were so bad, but I’m super confident in their strength now, they look and feel rock solid!, unlike ever before!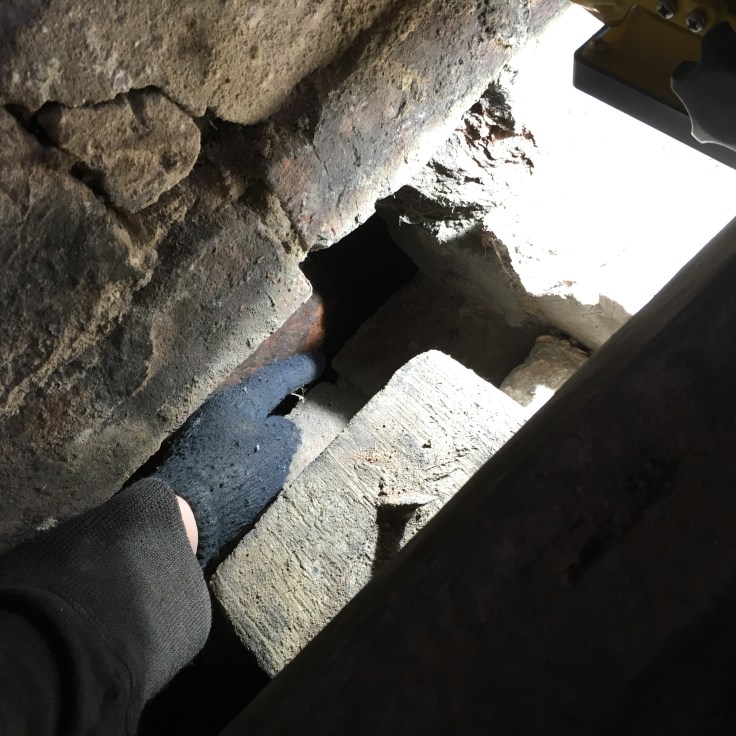 Use a level at ALL times, repeatedly, to ensure a level finish to the tops of your joists. The longest level you can get. And be careful when bashing the thousands of nails into the metal bat straps which hold new joists ends onto the original cut back sections. Cartoon throbbing thumbs are only fun on cartoons.
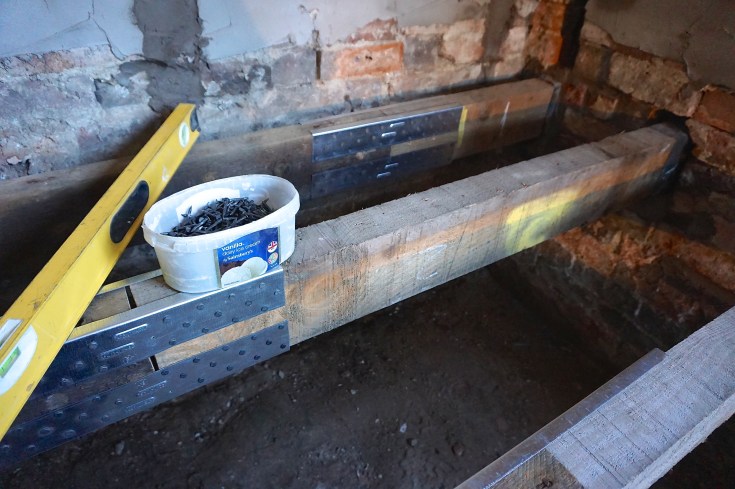 Make sure all your dwarf walls and mini supporting walls are solid and properly pointed up so they can adequately take the weight of the floor joists, flooring and all the furniture which will eventually sit on top of them! We had to build several new dwarf walls to take the weight of the long spans of joists, balanced previously on precarious bits of timber which had rotted away. We used salvaged bricks from elsewhere in the house but you can use blocks like these which are faster and easier.
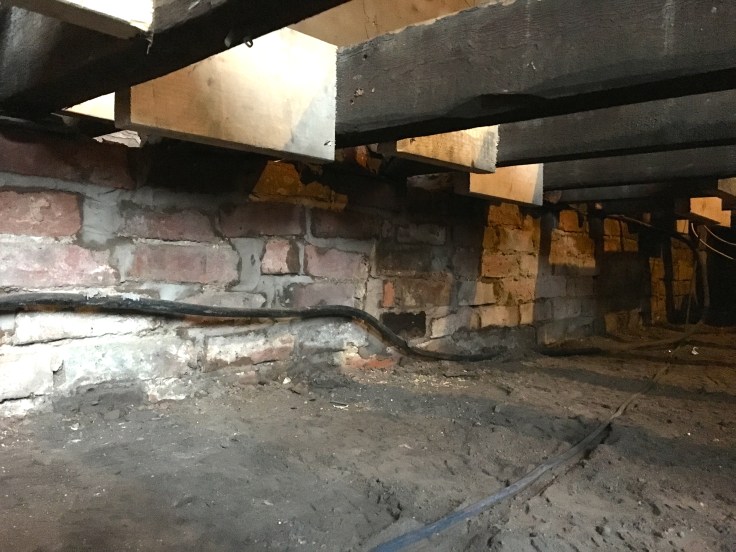 Treat your sub-floor like your bedroom carpet – be of the mindset that a nice tidy subfloor is a joyous thing. No rubble or debris allowed. Use a garden rake to get it clean whilst the joists are up, that’s a great tip as the rake pulls all the larger crap away and leaves the solid and dust behind. Watch out for cables.
Over this last fortnight we’ve cleared all the rubbish which 120yrs worth of builders had seen fit to lazily discard instead of removing from site. Bricks, cement, timber, bottles, rocks, tiles, you name it, we shovelled it. Great for the skin all that dust, just prior to The Christmas party season, oh yes. Makes you say naughty words.
So now the living and dining rooms both have *new* floors, using the old salvaged joists and offcuts created during the extension build. The next big job in January is to empty the last of the ground floor rooms, my office, and move me upstairs temporarily so we can do exactly the same as the above to that room too. Somehow it doesn’t feel quite so over facing now we’ve done it here and we know it’s possible for us to DIY!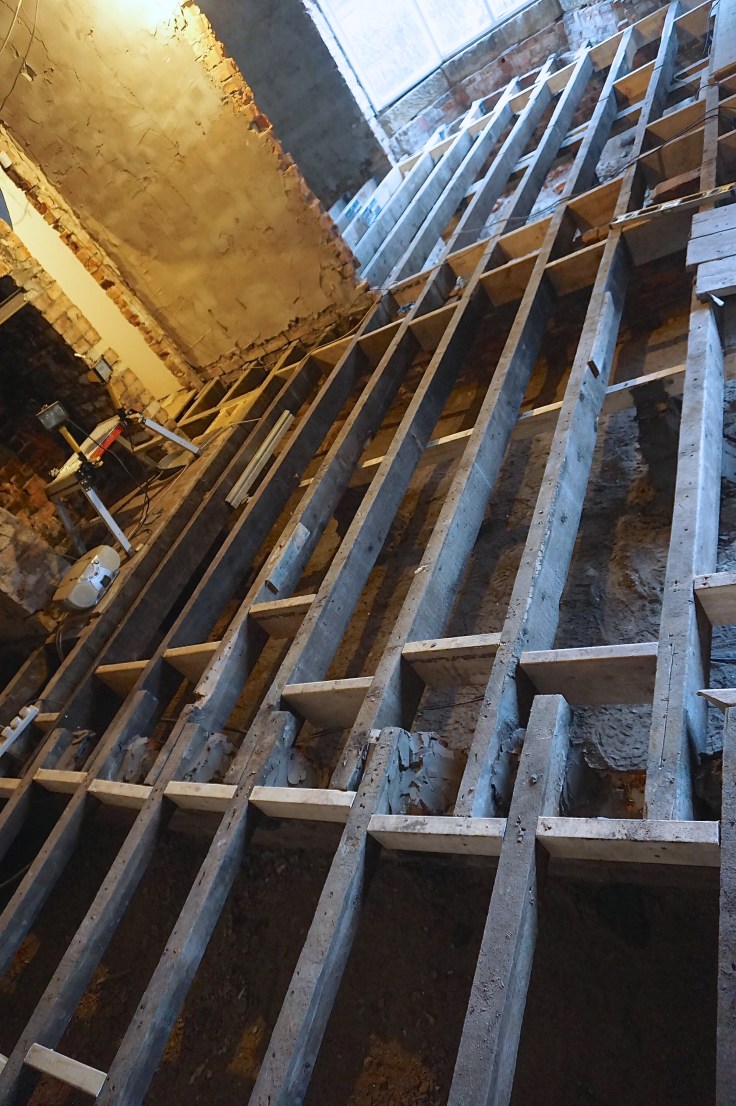 Then we can start to get on with the next big decision – the underfloor heating system which will be the most effective for these eclectically spaced joists, large sq ft area and high Edwardian ceilings. Before that, obviously, we’ll be thoroughly insulating between all the joists to stop heat loss. These rooms have been freezing our feet for eight years from the cold draughts coming up through the old floorboards, I can’t wait to be able to walk around sock-less!!
And after all this, amazingly I still have some nails left thanks to the only hand cream on the market which keeps my lady builder hands bearable. Not talons, admittedly, but at least 3mm 😉
P.S. I do not get free hand cream x

Hi,
Just curious, you might have already explained it earlier (and I did read it all but might have forgotten) but why did you choose suspended floors over solid? Getting good insulation level is so much easier with the latter AFAIK.
Thank for the interesting blog.
Hi Joe, basically we’ve a period property with very deep sub-floors so backfilling them would be exorbitantly expensive! Good 50mm rigid floor insulation + ufh will make a huge difference for us.
Thank for stopping by the blog 🙂