 Henceforth, all and any Moregeous interior design work will be taking place in award winning florists. It’s official. Not only are they the sweetest smelling spaces, but everyone is happy in their work, everything is beautiful AND you get invited back to take part in fantastic workshops. It’s a no-brainer!!
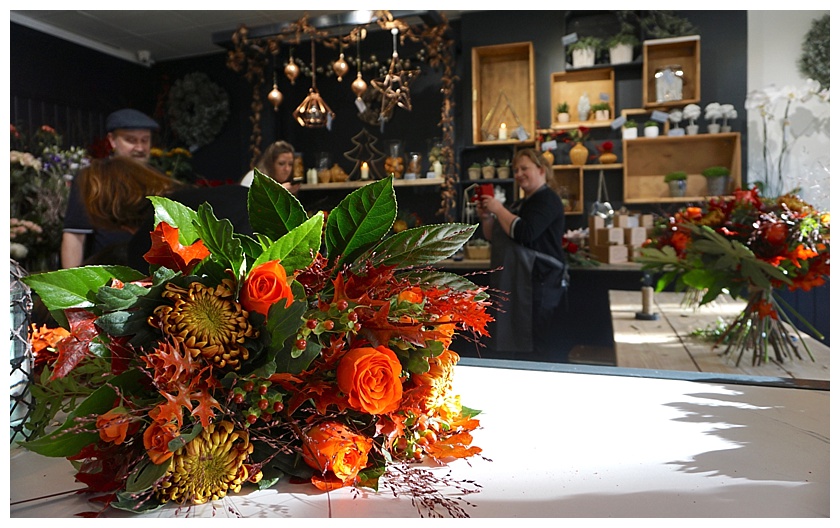
Our work is all finished at the Didsbury Flower Lounge, facilitating the space and design layout which owner Siân needed to host creative flower workshops. Today was the very first one and guess who bagged an invite! Today actually felt like a normal human being type Sunday, doing nice stuff with my sister and not wearing work pants. Anyone in the middle of their own reno knows that generally weekend are just more DIY days so today was a treat with a capital T.
 Let’s tick off the treats shall we? Cake. There was cake. Prosecco. There was prosecco. Double boom already and not even out of the starting blocks.
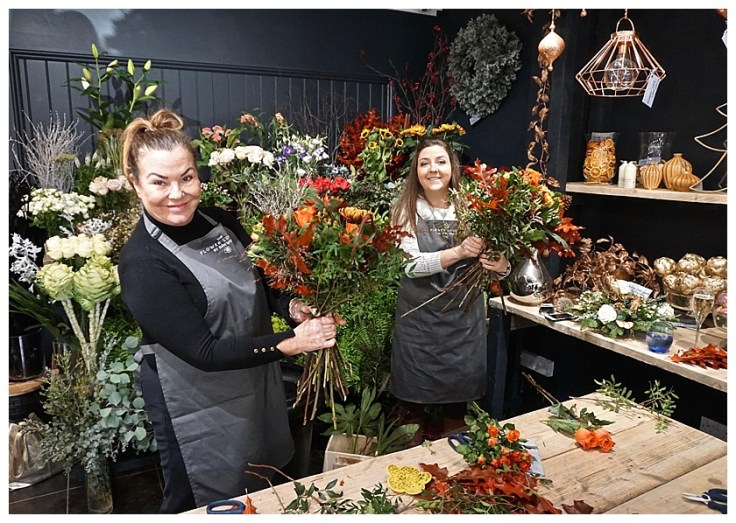
Our mission was first to watch closely as talented florist Mark Entwistle snipped, trimmed and prepared autumnal flowers and seasonal foliage, deftly twirling them systematically into a tightly bound, full of colour, hand tied bouquet.
 See how Mark made that look effortless? Easy, right?
Ha! First I forgot to cut my three red oak leaf stems into two to give me six, then I snapped one of my spectacular roses (Not to self: roses are quite delicate, they are not hammers) and then I managed to tie my fingers into the natural string binding. I now know for sure that floristry is not my missed vocation in life, but I also now know it’s a whole lot of fun to do on a Sunday afternoon.
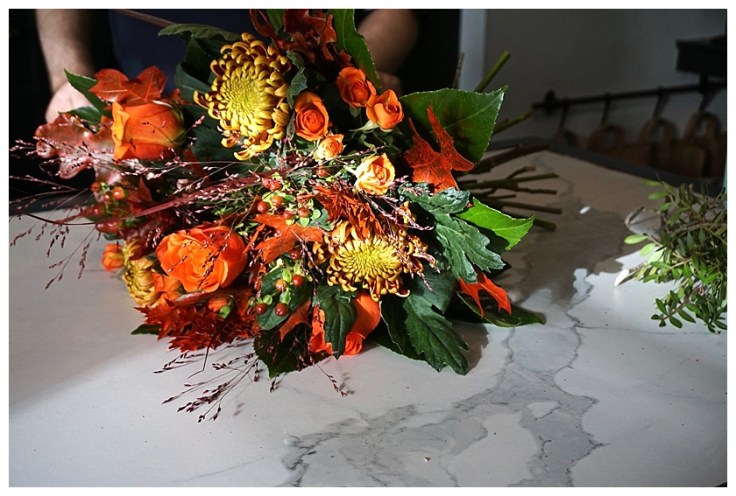
Here’s a quick run down of instructions for the bouquet we made, but, of course, you can buy whatever flowers you choose to suit a colour scheme or season :
- 3 large roses and 3 chrysanthemum stems
- 3 smaller sprays of roses and three stems of berry heads
- 3 elegant wispy sprays, 6 oak leaf stems, lots of green foliage, 3 outer large leaves to frame the bouquet
- Clean off all foliage from below your chosen binding point, which is also the point to clasp all the stems
- Chose a central flower – one of the larger blooms – and hold it, at it’s binding point, between forefinger and thumb
- Simply add in the rest, methodically and carefully, in a clockwise (or anticlockwise, whichever is more comfy for you as long as you’re consistent) direction. Add the stems at an angle to follow the angle of your thumb holding the flowers, with the stem sort of pointing down your arm, to get the splayed effect of a hand tied bouquet. Feels weird at first but then you’ll get it.
- Be consistent when adding in the blooms, eg. add in each of the threes in a regular circle evenly as turning the gradually forming bouquet.
- Regularly pack in some foliage – though not below the binding point – and pull it down lower than the flower heads to add volume at the base
- Keep checking the effect by looking at the top, or in a mirror if you can!
- Use the three large leaves to frame and finish
- Tied off at the binding point using natural string or ribbon, and cut the clean stems at no less than a 1/3 below and 2/3 above the binding point.
- Pop into water and enjoy!

 The absolute trick is to use a tight hold, clean off all stems so the ones held between forefinger and thumb are clear of volume-adding leaves, and always rotate the bouquet in one direction when adding flowers. As each stem is added, it must be angled to following the angle of the holding thumb, so all the stems spiral around the same way.
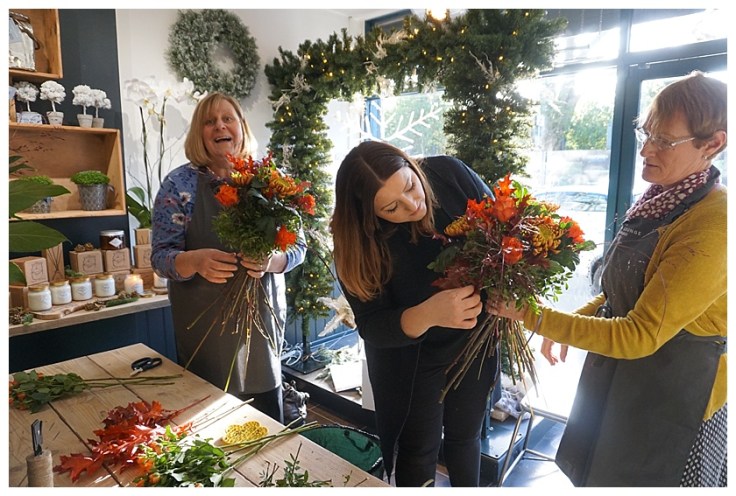
With guidance from Siân and Mark, our concentration, coupled with more cake and bubbles, garnered some pretty spectacular results.
 Being in the shop we’ve helped create, surrounded by festive decorations and guests having a great time was just wonderful. It was ace seeing how the bespoke tables and display units we’d built worked in the space with actual instead of imaginary people using them. Thank goodness they worked well, or I might have had to sneak out in embarrassment 😉
Of course not everyone had their highly competitive sister next to them giggling when they made a mistake and sneakily not mentioning that she’d once worked in a flower shop so had a Head Start in the bouquet race. Hmmmm. I’ll get my sisterly revenge on the wreath workshop 😉
 I actually feel super confident about buying some flowers and creating my own full bodied bunch so the workshop totally did its job in that regard. I might have to buy one of those hand strengthening exercise thingies to build up the muscles in my thumbs first however, to get them as Terminator like as a proper florist’s! Once you’ve nailed the technique, I guess it works with most blooms. Now though, I just want it to be next summer so I try it out with some from my own garden.
Go check out the gorgeous interior and maybe a Christmas wreath workshop by clicking here, and no, this isn’t a sponsored post, I’m just very chuffed with what we’ve helped to create. I hope you enjoy it and if you book one, do let me know! x


Leave a comment