Slavishly following trends doesn’t make for a fabulous home, in my humble opinion. Well, it could, but only for as long as the trend lasts, which in today’s speedy world generally isn’t very long at all. I recently wrote about some new woven lights I’d seen at Spring Fair, a modern twist on the classic seventies, pale timber pendant shades. Alongside beaded chandeliers – hugely expensive a couple of years ago but now coming through to the high street – and the ubiquitous industrial cages, rattan style lights are shining brightly.  I felt inspired, looking as I was for interesting lighting over our dining table, but didn’t really fancy a single pendant, even an oversized one. Grouping shades together looks luxe and purposeful, I’m sure you’ve seen this featured in style shoots. It’s something designers often do, and with good reason. Having already nailed the look several times using filament bulbs, I mulled over a way to personalise the look of wicker lighting. To make it my own. Make it Moregeous.
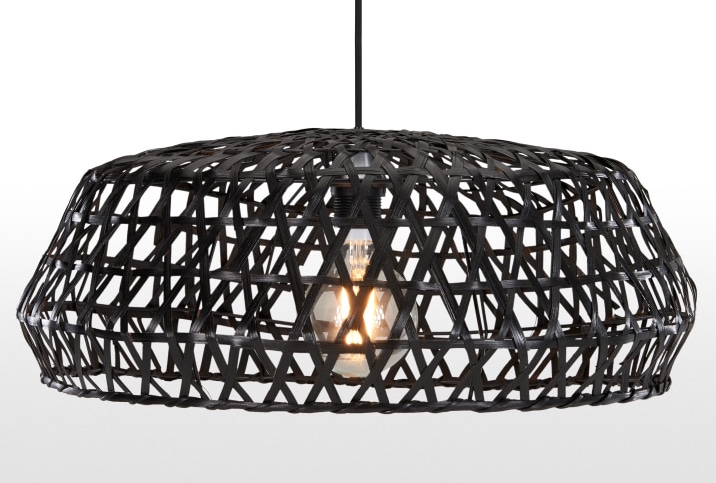
I started searching for woven lighting and pretty soon found this one on Made.com, a company often at the forefront of what’s hot in interiors.
 Literally had my name written in the weave, can you see?
At £50 it wasn’t exactly a bargain though. With a long reno road still to walk (trudge), I had to think smart if a) Mr M wasn’t going to kill me for b) spending much too much on one area of lighting and c) I still wanted to achieve the multi-black-woven-shade vibe. The plasterers are here next week to finish skimming all the hallways and wouldn’t thank me for spending all their dosh in a 70s splurge. No, canny buying would be key.
Canny buying = chazza shops. Did I have the time to trawl around Manchester in the vain hope of unearthing Auntie Ethel’s old kitchen light, complete with essence of chip fat? No. Did Ebay come to the rescue? Yes, it bloody did! Look what I found…


I know. They look minging. Especially the one on the right. But they were cheap, here next day and it’s amazing what a can of matt black spray can do. Yep, spraying, I decided, was the way to achieve a super cool and personalised look in an affordable way.
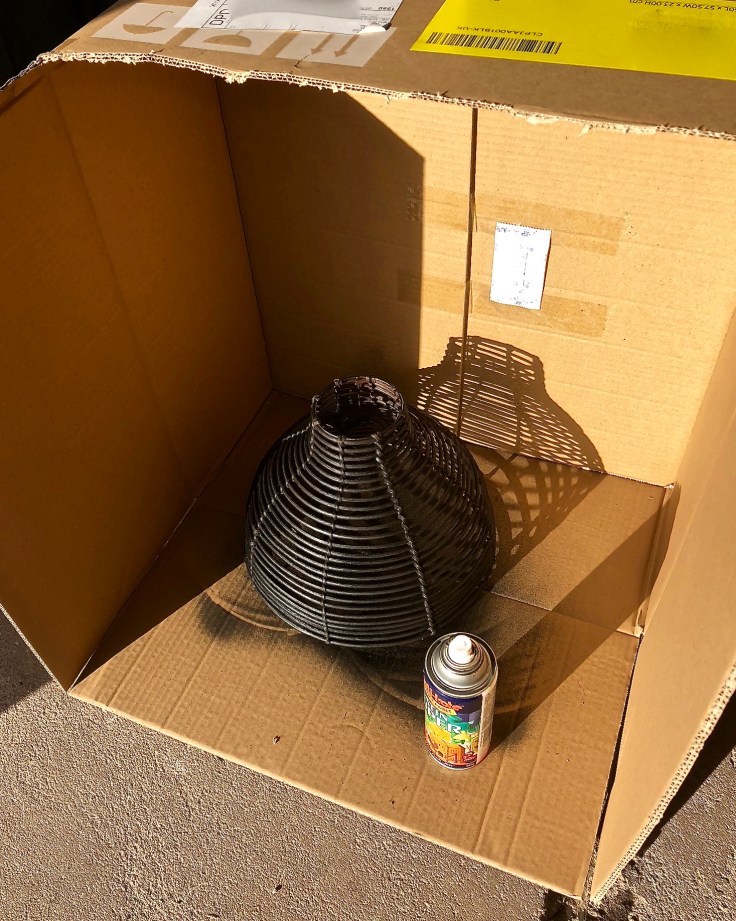
 I set up a little spray workshop using the Made pendant delivery box (we aways re-use stuff here). This is a great tip for spraying, as a large cardboard box will contain most of the spray, as long as you work in short bursts and allow time for it to settle in between coats.
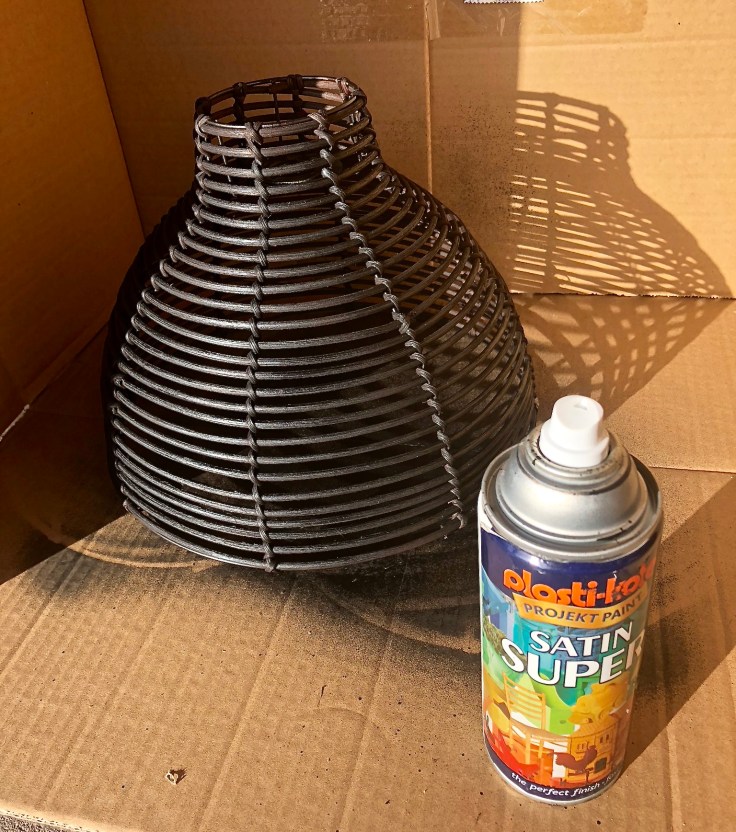
First I used up some Plasticote satin black I had left over, not bothering with a primer as bare wood ‘takes’ spray colour really well. This dark brown one was pretty easy to turn black as the colours are so similar.
 Cheaper than the DIY sprays is car touch up spray at around £5 a tin. I find it dries quicker too, and is less prone to drips. Mind you, if you’re heavy-handed and just keep that trigger finger on the nozzle until the colour is dripping off your project, no amount of advice will help. Light and easy, in short sharp bursts, is key.
Car spray dries in seconds so I had both shades complete in a matt black top coat in under half an hour. Then the next half an hour was spent faffing about with levels and positions and getting it spot on for each light. Look at this face.
 That’s a happy husband right there. Happy in his work. Happy happy happy. Happy days.
He hates me there, I do know it. But I can shoulder loathing in pursuit of the perfect pendant drop.
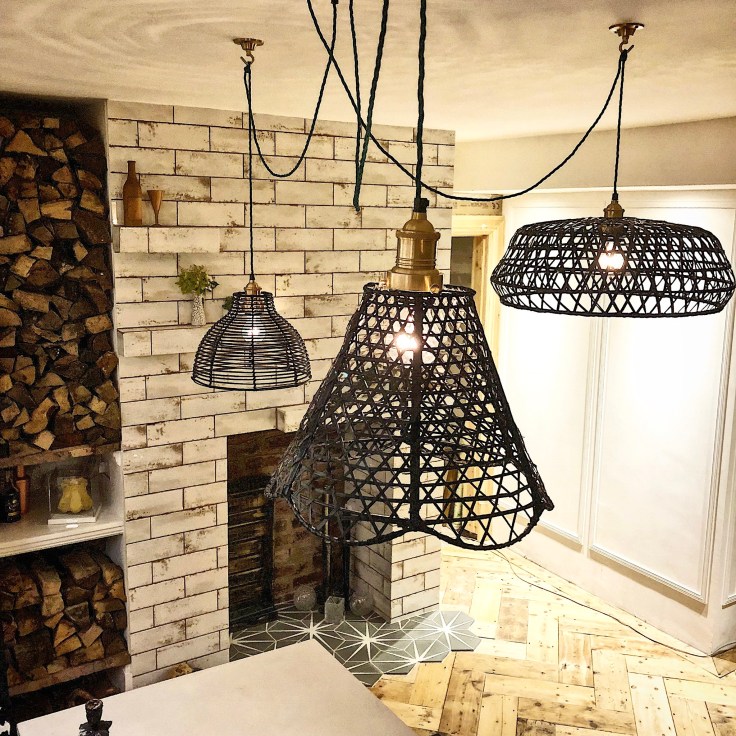
Once this very clever man – sucking up to him here, by way of apology for that photo – had attached all three fabulous brass lamp holders to the green cables, we worked out where the hooks would go. If you’re doing this, I’d advise starting with the biggest shade and then adding the smaller ones afterwards, as we did.  It takes two people to hang lighting like this and even though it’s irritating, getting down off the ladder and standing back to check cable lengths from different angles of the room is really important. I wanted the differing sized lights at differing heights from the table, as opposed to all regimented. ‘Random’, as we all know, is far from it. ‘Random’ is like the no-make up, natural look. Takes an hour of hard work to achieve.
And so the the finished result, ta daaaaaaaa….
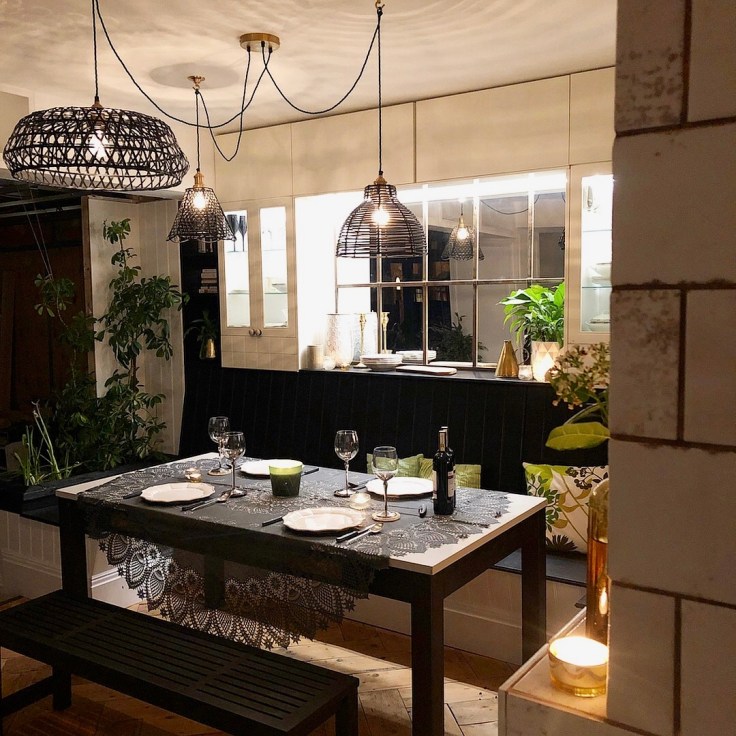 Black detailing to add punch to the white ceiling and complement my seating, emerald green cabling to pick up my indoor tree growing in the background, brass fittings for a touch of glamour and lovely organic shapes & shadows to soften a sharp monochromatic scheme.
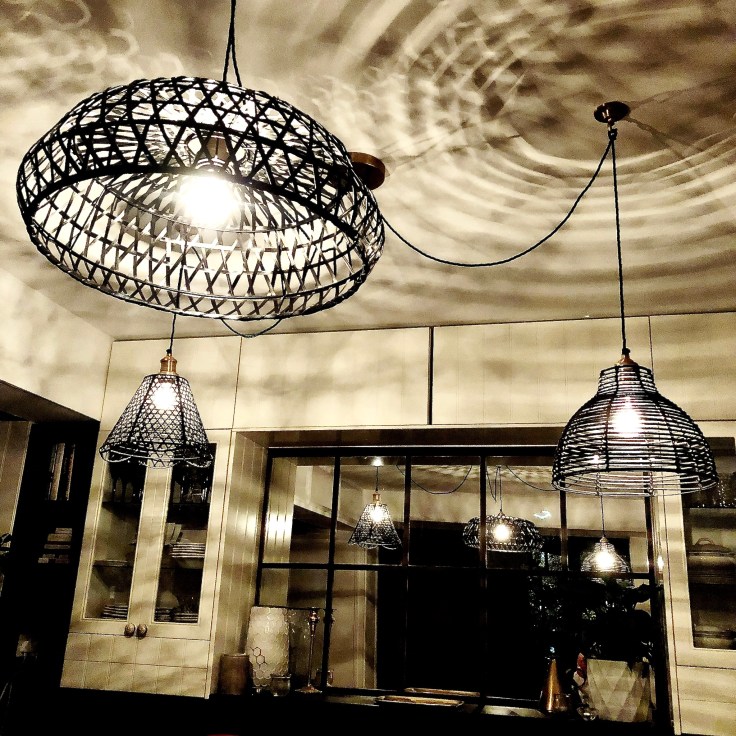
 Couldn’t be happier with how they’ve turned out, honestly. I ummed and ahhed for ages over which ceiling lights to hang in this room. Being inspired by a new trend has helped me achieve my perfect look and that’s exactly how trends should be treated – existing to inspire not to enforce religious copying.
Creating a way to make a trend unique to you is fun and challenging if you’re attracted to a current look but want to make it your own. I’d like someone to try this out but spray their rattan neon pink with chevron cabling. Wouldn’t work in my house but do show me if it’d work in yours and you decide to go for it! x