
Aaaaaaaaaand, relax. We can finally sit on soft seating, lean at a comfy angle, grab a plate, invite some pals over and eat dinner in comfort. In all our twelve years in this house, we’ve never had a great dining room. That’s not to say we’ve never had great dinners, either as a family or with friends, but never in that grown up way of having a dedicated dining space. But now we do, and I couldn’t love it more.
Now, granted, the shots don’t show an actual table. Even non-interiors experts will know that this is a fairly integral part of a dining room. But imagine if you will that the table has been moved aside for a party. Or that it’s simply been moved aside for a photo shoot allowing the floor and fireplace tiles to be seen, which is the reality of these shots.
This has been a helluva DIY job. Our blood, sweat and tears have been poured into Moregeous Mansions, as you know, and quite a few of them into this room. It’s been a long process, so how do we home renovators keep motivated? How do we see the design wood for the trees, when we’re deep, deep, deep in our own home renovations? Well, it’s not easy for sure, but one way to both keep sane and keep the momentum going is to concentrate on your end game. I had the design for my dining room in my head when it was still the kitchen (pre-extension) and all through the mess and the rubble and the build. I printed off photos of rooms which inspired me and pinned them on a wall. Not just Pinned on Pinterest, but actually Pinned. I scrolled through Instagram, of course this is 2018 after all, but it’s mostly kitchens, bathrooms and bedrooms, not really that many dining spaces to be had. I knew the layout I wanted, and stuck to it.
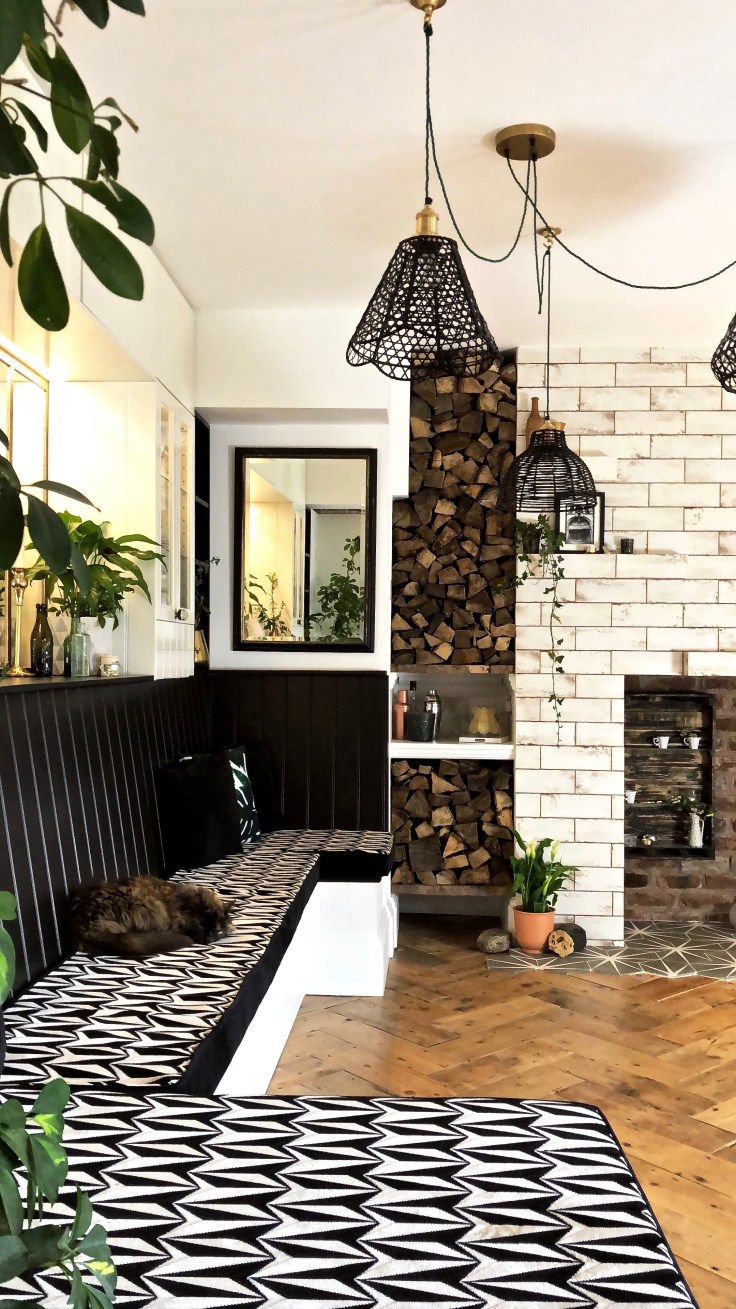
 So here is the dining room of my personal dreams after the carnage of a rebuild. There’s the banquette seating wrapping itself the full length of the room and ending in a lush planting box. The storage above for glasses and tableware, eminently practical to allow clean wine goblet or cheeky shot glass reachability without anyone actually leaving the table. The crisp black and white scheme softened by lots of added greenery and a tall log store, plus gin shelf. Not that I planned the entire room around alcohol consumption or anything, you understand.
 Just as I’d imagined.
Although, maybe, hang on a minute. I said have a plan and stick to it didn’t I? I meant it, honestly I did, but when I say stick, I don’t mean be completely unwavering. Design layers over an original plan are totally allowed, especially on those long haul renovations which take four years instead of four months. Adding innovative ideas and design solutions is how a room becomes your very own.
There are definitely a few more tiles on the chimney breast than ever intended – they were a surprise decision when I spotted our Diesel beauties at a local retailers. Maybe I didn’t reckon on the wicker lighting either, something of a wild card after Spring Fair’s woven lighting displays. The tiled shelves over the fireplace were additions too, adding cool display areas for obligatory shelfies. And I’d originally dreamed about square patterned tiles, but was bowled over by these hexagon Lilypads spotted last year at a trade show.
 The lesson from these changes is one I learned a long time ago, that rigid adherence to a decided design scheme is one which often gives rise to a fairly sterile look. Not always, but often. For me the best rooms are the ones which have evolved and flourished over time, the basic layout is there but the different elements within have grown and been added to over time. This can be hard in a newly renovated home or room, when lots of ‘stuff’ is being bought new, and is where buying vintage or reclaimed, adding greenery and personalised or upcycled items ensure depth and personality.
  For example, the large metal grid mirror which forms the reflective backdrop toy dining room was sourced at one of the Arthur Swallow Fairs. It’s actually an old mill window from a long abandoned building in Cheshire, which has been salvaged and then beautifully glazed. Yes, you can buy these industrial style mirrors new, but there’s something wonderful about owning a piece with heritage and history etched into the patina of the metal work. It was around £300, which for something of that size is pretty damn good too. Get yourself to a salvage fair this summer, you won’t regret it.
It’s hard to reconcile the filthy building site below with how it looks now isn’t it? Though actually, you lot are hardened renovators aren’t you, you’re probably all living just like this yourselves. Let’s have an in depth look at the stages we went through to get to the finished room. Did I say stages? Clearly I meant pain. The pain we went through to get to the finished room…
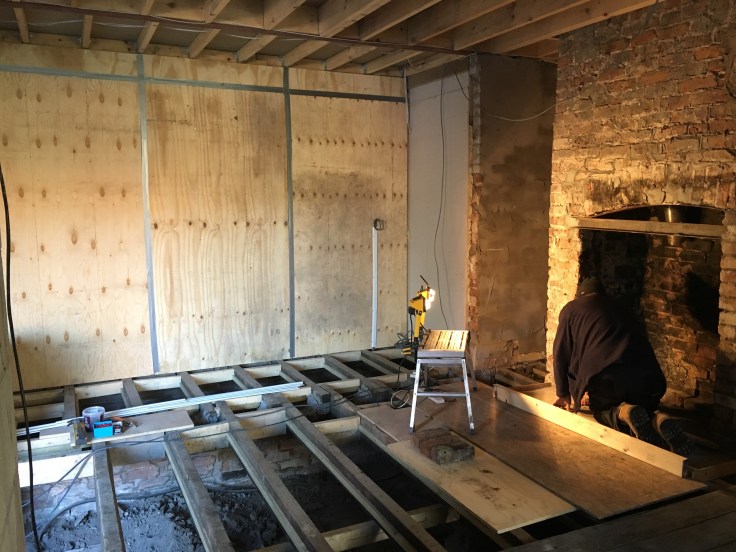 God, this seems like a lifetime ago. No boards down, no underfloor heating, no electrics, no plasterboards, just poor Brickie Brian strengthening up the fireplace reveals and re-pointing the holes in the back wall. Which we could see the hall through, before Brian worked his brickie magic. You remember Brian don’t you? Otherwise known as Joan.
In between all the joists above lay the 50mm Kingspan to insulate beneath the wet heating pipe system. You can see the thin timber lats attached to the joists, which the rigid insulation sheets sit on. I can’t tell you how amazingly warm the house is now most of the downstairs is sealed. Worth every single penny and every dirty hour I spent under that floor. There’s blog post here on how we did it, with lots of images.
 Once the insulation, plywood, UFH system and screed were down – yeh took about five minutes 😉 – I could lay out and glue the giant parquet. These boards are our original Edwardian floorboards, lifted during the renovation, sanded and cut to equal sized by the long suffering Mr M. What a labour of love. Yes, we could have bought parquet or new timber but we’re all about re-using and not wasting materials, plus original yellow pine is the timber most suited to Victorian / Edwardian homes. It’s what was used originally. It’s filled with the memory footsteps of 120 years of life.
 Now usually a gorgeous floor goes down post-plastering but these piles of cut boards were getting right in my way. I knew we could cover them using the ace Protec protective cardboard roll once we started decorating, so we made the decision to get ’em shifted and get ’em down. The plasterers were stuck on a big commercial job, so I cracked on with tiling the chimney breast in the industrial textured metro tiles. Mr M did all the mitred edge cuts with a wet cutter, as I wanted the tiles to look like bricks wrapping round the corners. He’d never done this before and completely nailed it. My metro hero.
 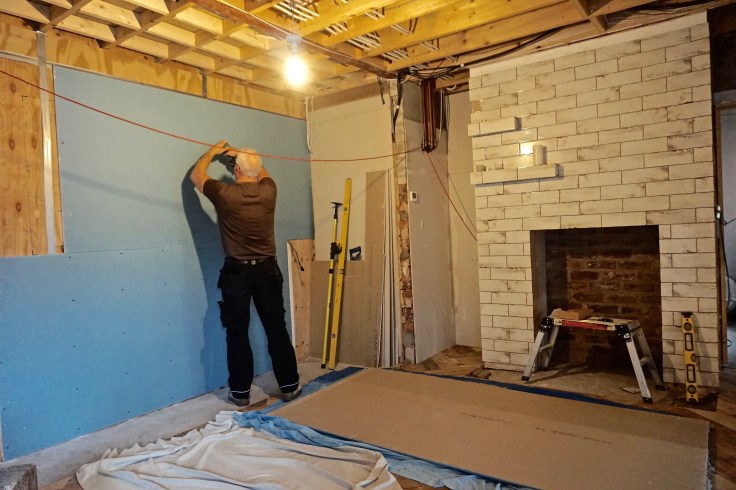 Time for plasterboards – blue on the party wall for extra sound insulation from next door, or ahem, to prevent our noisy dinner parties keeping them up at night. The existing party wall bricks were of pretty rubbish quality so we lined the whole wall with 18mm plywood to give a good strong surface to hang the wall units and mirror from.
 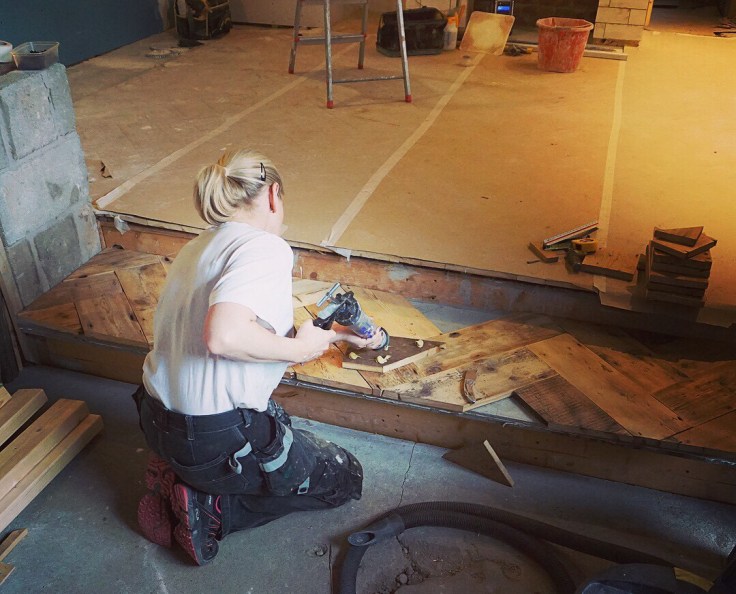 This is how I laid the parquet, using a gun and an Everbuild product called SikaBond MS Wood Glue, which comes in foil tubes. A flooring contractor friend recommended it and it’s absolutely brilliant and super easy to use. It sticks perfectly to screed and is quite thick so gives the opportunity to play a little with levels when laying boards which aren’t regimented thicknesses. Good coverage too, I didn’t cover the entire board but put equally spaced blobs (see picture) which flattened out as the board was pressed down, and stuck to the screed. Moregeous highly recommends!
 Once the plasterers had been – no, we don’t DIY this job – and we’d painted the ceiling, Mr M got on with building up and hanging our Ikea units. I’d always imagined keeping this space light and airy, but did waver a little due to all the amazing dark kitchen images online. This room is central to the core of the house and though it gets light coming in from both the large opening to the living room and from the kitchen bi-folds, it is effectively windowless. I decided to stick with light and airy.
 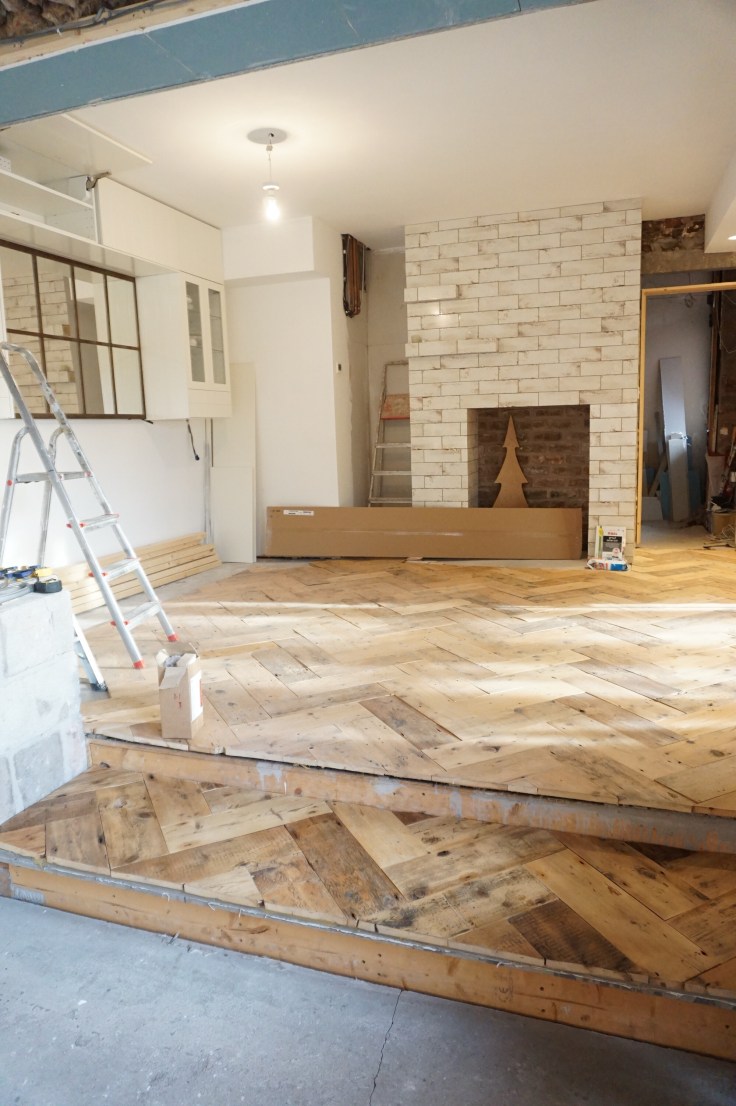 We were so determined to have Christmas dinner sitting at a table that December 2017 was a full on hell-for-leather DIY month to make it happen. The OSB, gold painted tree in the fireplace? Festive inspo 🙂
Time to build the seating…. We asked a joiner friend to help get us started (thanks so much Ian) setting out and getting the angles right, then Mr M got stuck in, cutting, sawing and scratching his head. The skirting recesses back slightly from the front of the seats to allow big feet to sit comfortably, the beaded MDF had to be lined up and the left hand end of the seating tied in with the tree box. All details which add time and head-scratchiness.
And hanging that mirror, gawd, what a nightmare. So, so heavy. Super unhelpful fixings on the back. The dilemma of how to hang it and get it up tight to the bottom of the wall units. That mirror cause marital discord, let me tell you. Yes, it looks great. Did I loathe it for a few weeks? Indeed I did. 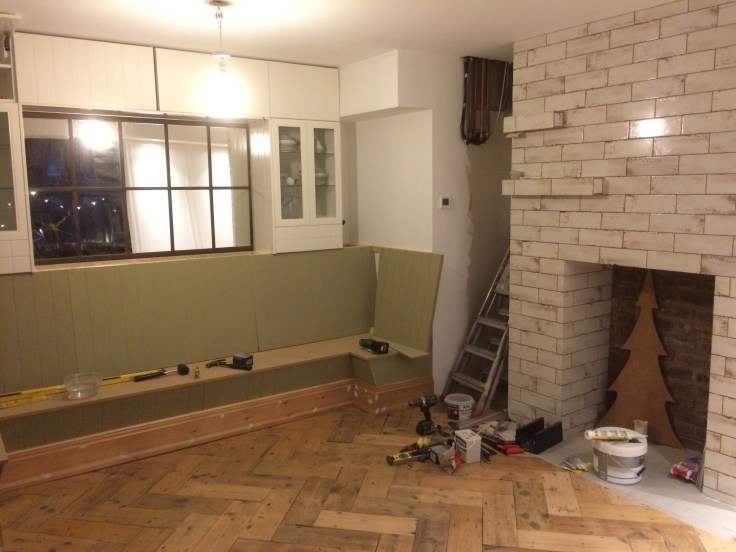 Adding the seating back with hidden storage and building up the tree box next. The soil goes all the way down to the ground under the house, an idea I’d had for the dining room since way before we started the build.
 Having plants in the house has always been important to me, every since buying my very first flat, and the now planted Umbrella Tree makes me do a happy dance every time I water him.
 Tiling the hearth was another of my tasks, setting out all the hexagon Lilypads and getting the pattern spot on before I started, then making sure the hearth was smooth with self-levelling compound before any adhesive was spread. I always lay out my tiles in the working room if there is a set pattern to lay, that way no mistakes should be made which are hard to rectify later. You can see the tiles laid out to the bottom of the image above, but I’ll do a post on this soon(ish). Tiling in slippers in de rigeur in my house.


Painting all the woodwork took another week or so, not helped by me changing my mind on the seat colour half way through the job. What did I say about sticking to a plan? The Instagram Poll on this was literally 50 / 50.
 Installing the black carcass side units sealed the deal. The more we looked at fabrics for the seating, the less I liked the white seating back. It didn’t match the off-white Ikea units for one. And it didn’t look punchy enough, for another.
Lots of you (including Mr M) wanted them to stay white but I had to be the final arbiter. Even though it was going to take more time… and use more paint… and therefore money…
 It’s a good job I was close to that gin shelf, is all I’m saying. Note the no gin left.
 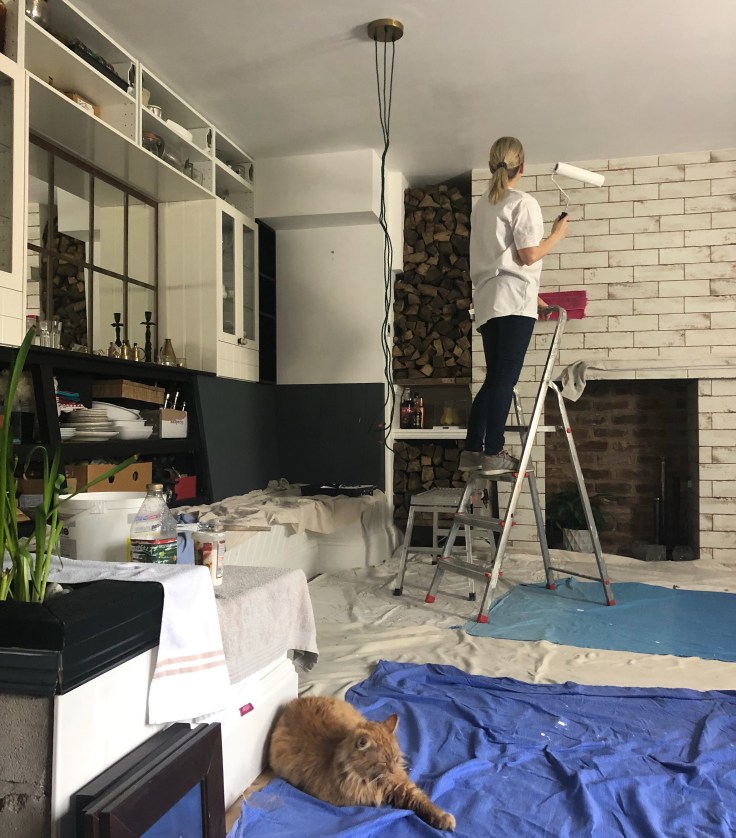 One final coat to the ceiling as it looked a bit patchy. So good that I had a helper that day. You can see the hidden seating storage in the shot above too. I bloody love this.
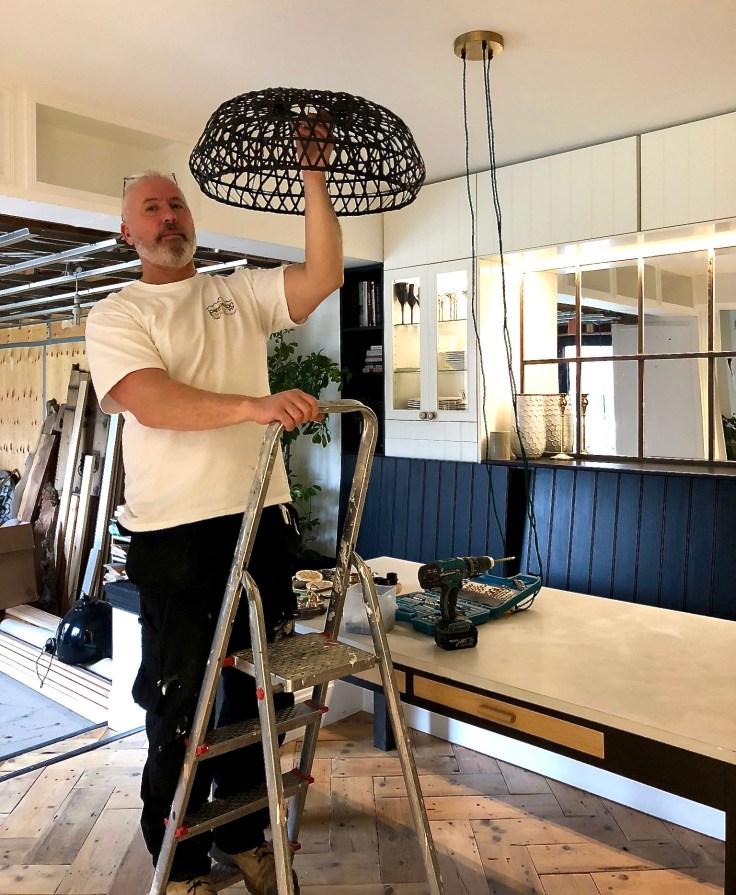 Talking of love, his face in this shot kills me. The face of a man who has been asked 76 times ‘Up a bit’ ‘Right a bit’ ‘Left a bit’. He would kill right now, if he we hadn’t already laid the cement patio and sealed all the floors so he couldn’t hide my body.
 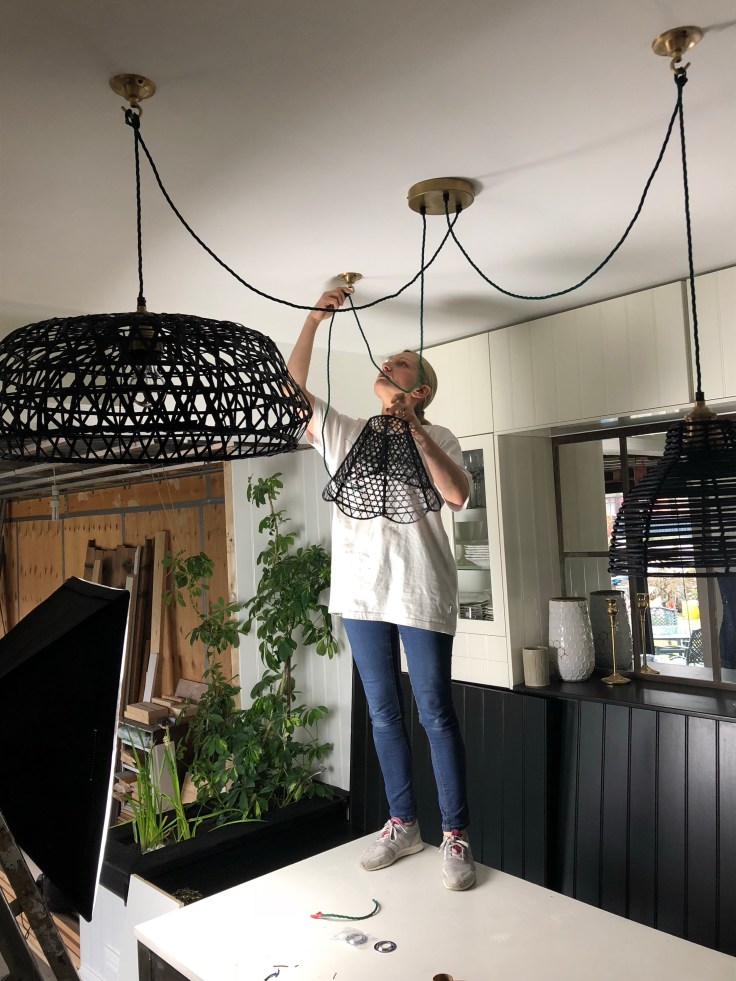 Let’s have some fun with the lighting, I said. Let’s make something unique, I said. Two days of spraying, wiring, fiddling, drilling, moving, adjusting and cutting later…
 One final clean down and a final black top coat to the seating and matt varnish sealant to the pine parquet. This floor had four coats of water based sealant to properly protect it. Each time it was coated it became richer, but without that awful yellow shading of cheap vanish. Granted it looks a bit yellow in the image above but that’s more the poor lighting of an iPhone & lamp-lit shot.
 Filling our home with re-loved, painted and luxed-up charity shop or salvaged finds is going to be the way forward here, given that like most renovators, all our hard earned cash has gone on the actual build. I found an old teak bench in the rental cellar and give it a new lease of life using Coal Black Fusion mineral paint. I’d never used this product and really liked it. Must have liked it, I’ve ordered more!
 The long lusted after fabric arrived and was examined. By both myself and the Rockster. Immediately. Within about 45 seconds. The very expensive fabric. There has been a bit of a saga with this part of the reveal and I sadly won’t be able to show you the rusty hexagon side for a few more weeks, but the Origami Rockets pattern is everything I’d hoped for. Someone said to me “It’s only cushions Sian”, and yes, I know that, but I’ve waited patiently for months and months and was so excited to get them. Nothing every runs smoothly does it?!
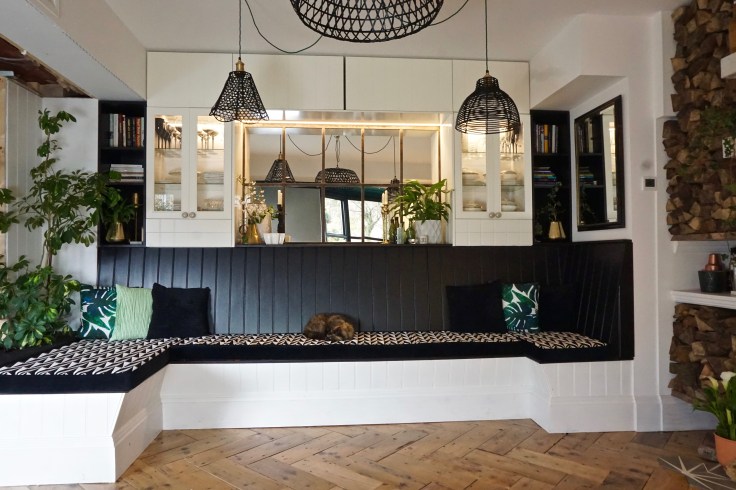 Adding geometrics to a classic scheme is a great way to give it a kick up the 2018 backside. I’ve want Moregeous Mansions to have a classic design, but one which can be updated and one which I can have (a lot of) fun with. Changing a bit of wallpaper or lighting or seating fabrics doesn’t break the bank but can totally transform a room. At some point I’ll have a few scatter cushions made in the Origami fabric but until then, some botanicals will have to do!
Builder Cat hasn’t spent much time sleeping downstairs since Rocky arrived last summer, she’s been in a bit of a huff at this boy invading her domain. This is the first time she’s curled up and slept down here in six months. This made me very happy. She clearly approves. I hope you lot do too! x

Stunning! Stylish and cosy. The black on the seat back was definitely the right choice – it grounds all the white. Looking forward to seeing pics with the table in too.
Thanks so much Vivienne. It’s such a big decision to change things half way through isn’t it, especially white to black! But yes, I’m glad I did too 🙂
What a stunning room ! Is there a paticular floor sealant that you use, the finish on the wood is lovely ?
Hi Caroline, thanks so much! I used a Junkers one but there’s also Bona. They are better than the DIY shed brands. Hope that helps x
Thank you so much for taking the time to reply. Yes that is so helpful.
Hope you feel better soon.