The moment we ripped down our old, bowing and dangerous bedroom ceiling, I knew that lighting was going to be an issue adding more cost to an already expanding budget. When a vaulted ceiling is created, one of the considerations to take into account in the more imposing open space above head height is the fact that lighting suddenly become much more complex than in a standard room. With the advent of affordable LEDS (I’m writing this in 2021), this is more straightforward, but back when we created this room in 2016 LEDS were still very expensive and our renovating wallet was getting emptier. I knew I didn’t want surface mounted cable spotlights stretching across the room, nor giant glass chandeliers and we hadn’t allocated hundred of pounds for over-sized designer alternatives. The upside to a decreasing bank balance however is an increasing level of creativity in both making and purchasing.
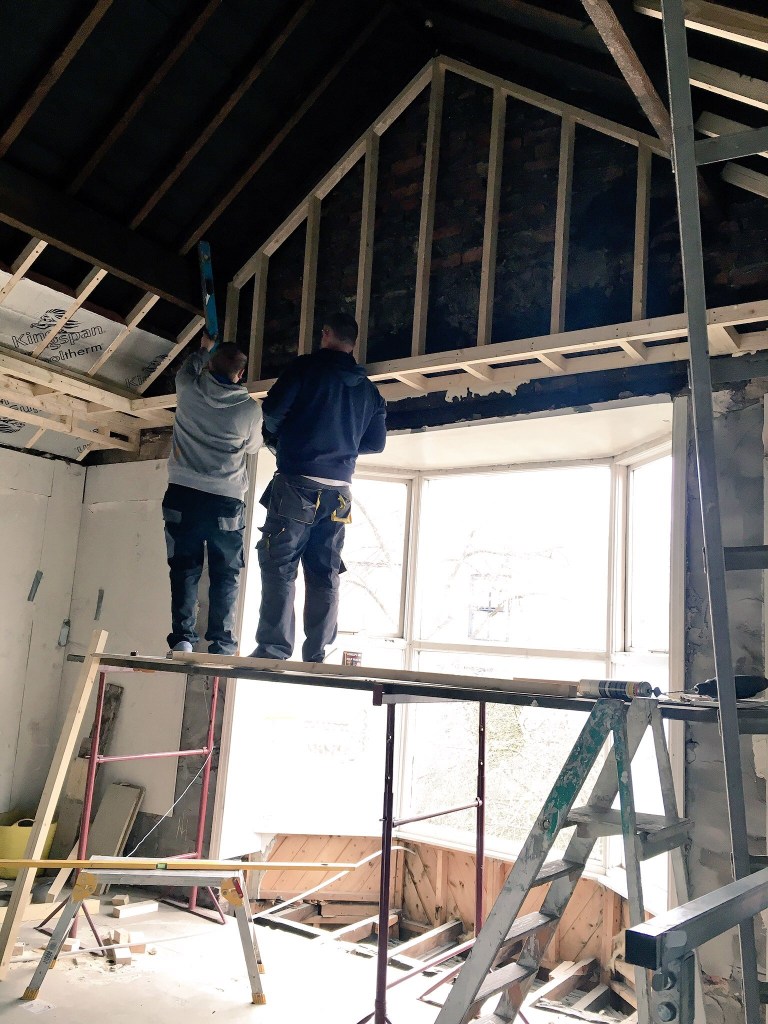
The scale of the space which needed to be lit is clear from the photos below: the first image as the builders constructed the frames to hold everything together and the second after plasterboarding had taken place. The scaffolding tower was a beast but entirely necessary, we had to support the bedroom floor from below with acrows to ensure safety due to the weight! It did make it so much easier to build the supports for the lighting to come. Not that I knew exactly what that would be when we started to build the supports, I just knew that something was going to hang from it.

Out shopping one day, you know, back in the day when we could go shopping, I spotted these huge beaded chandeliers in the sale in BHS (RIP). Because it’s taken me a while to blog these, you can’t actually buy these ones, but the method is as relevant as ever if you wanted to find something similar and have a go yourself. I miss our local BHS lighting showroom so much, some really affordable and excellently styled options.

In black and brown however they totally didn’t suit the vibe I was going for in the bedroom, intended to be light, bright and airy with lots of whites, textures and burnished brass. Although fabulously shaped and each with five lamps meaning they’d easily give enough light for the large vaulted space, they were not sexy. There’s a saying in my house though, oft repeated. If it’s ugly and doesn’t move fast enough, spray it.

Some of my tips:
- Dust and clean the surfaces first
- Mask off any areas you don’t want to spray with masking tape, and newspaper if necessary
- Use a spray primer on surfaces (eg glossy) which make not take colour or metal sprays. Read the spray tin instructions.
- As with all spraying, the trick is to work up to a good coverage with lots of light coats, as opposed to being too heavy handed. Allow to dry in between coats.
- A good tip when spraying lights is to suspend them at a decent height so you can work easily round them.
- Don’t wear your best clothes

It never ever fails to amaze me how a can of colour can completely transform an item, whatever that item may be, but this was a special spray can moment. Even Mr M was gobsmacked. He’d bravely confessed to not being in the remotest bit impressed with my brown beaded purchases and was utterly convinced I’d be putting them on Ebay within days. Oh he of little faith.
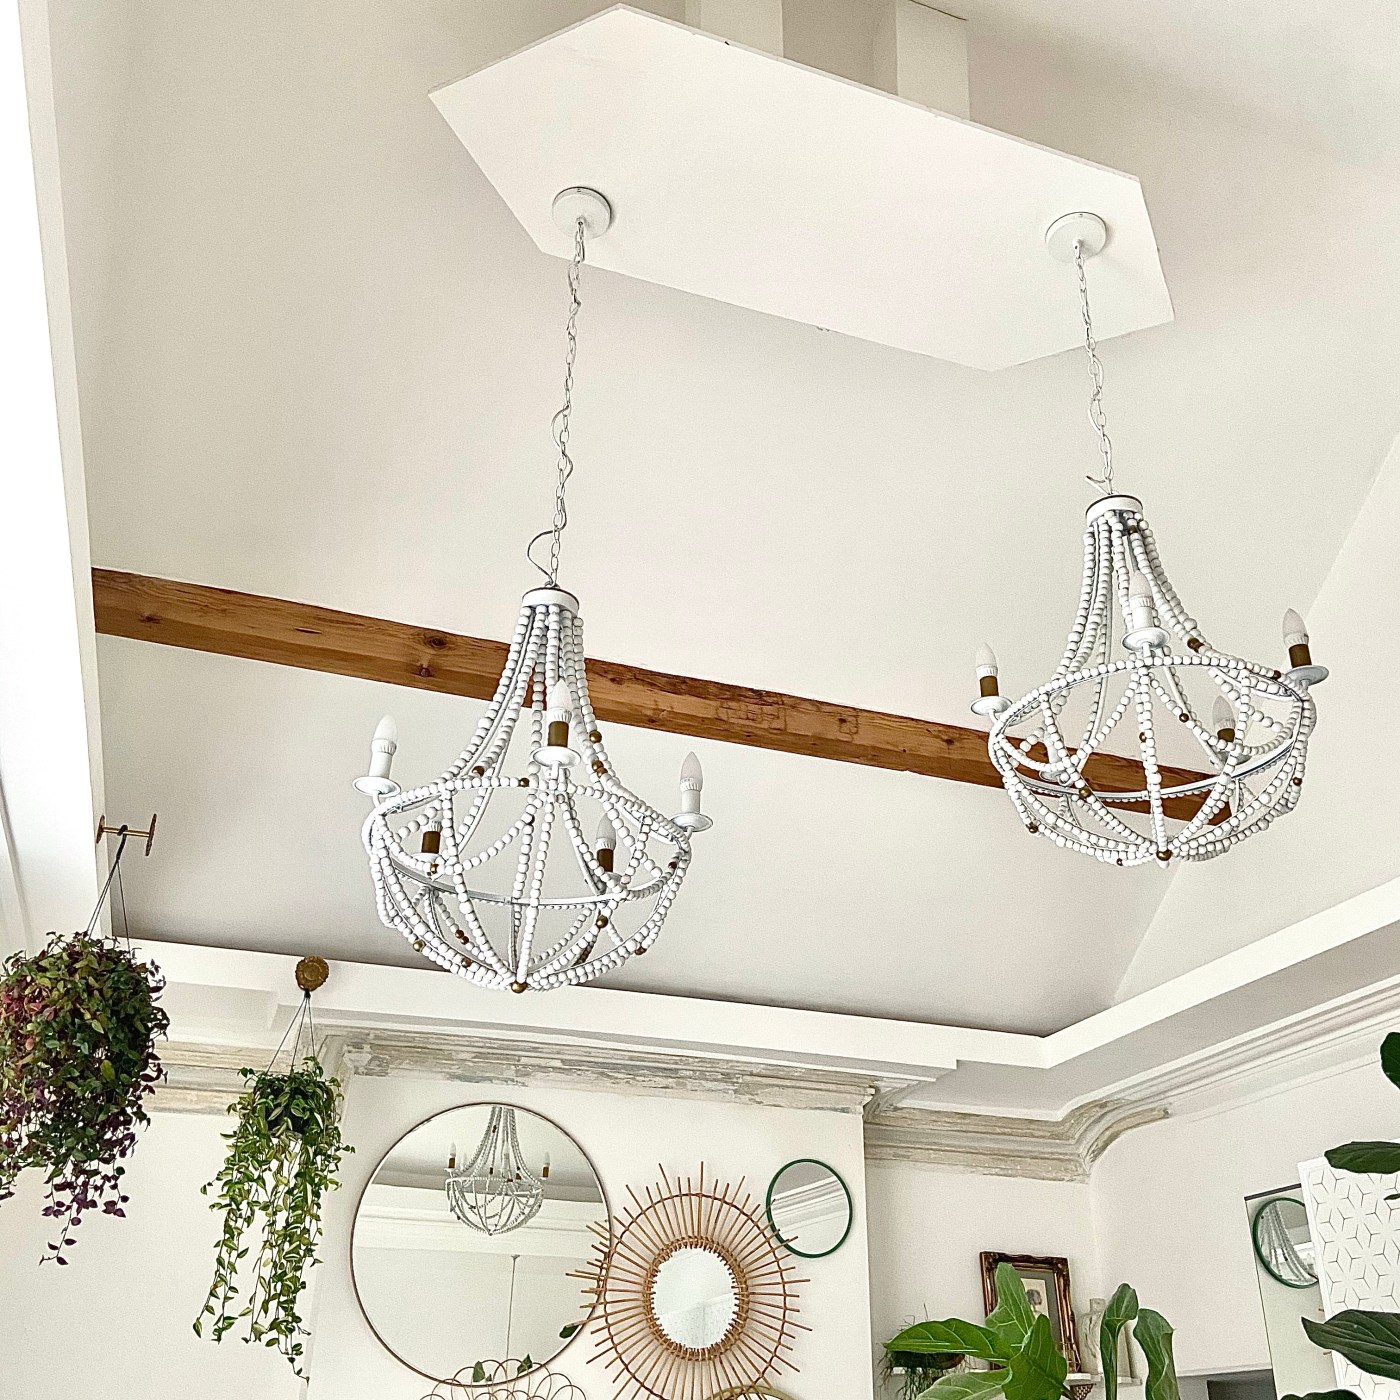
Once sprayed white, the light fittings were crisp, fresh and perfectly suited to the end goal interior scheme. It took under a day to do, just light coats to build up the depth of colour and the bifold doors wide open for ventilation. You can spray things outside but the air needs to be pretty still of lots of your spray will be wasted. They looked good but I wasn’t yet finished. Already in the bedroom are two brushed brass bedside pendants. I love a Red Thread and decided to make things even more finicky by picking out random beads to pick up the golden globe idea. Not as easy as it sounds and I had shiny fingers for days.

Finally complete, all dry and ready to hang… quick smart before the scaffolding came down!

If you look back to the ceiling being constructed you’ll see the two timber legs hanging down from the ridge. From this we build a secure frame, painted it and this gave a slightly lowered area from which to suspend the chandeliers as I didn’t want them on super long cables and chains. The two now sit side by side, though at different heights, illuminating the room wonderfully. When I’ve finished the new dressing table area and wardrobes this weekend I’ll take a lovely wide shot of the room and pop it on Instagram so you can see the whole

It was all a bit of an experiment really, but that’s the fun of renovating your own home and also taking time to do it. Fast renovations often opt for the simplest routes and standard choices. When you go slow, go bespoke and try new ideas, it takes time and effort. You can search around to find that perfect item, or nearly perfect anyway. And if it’s not quite perfect, there’s usually a way to customise, change or personalise it. No-one else in the world has these lights. No-one. I adore that about customising, don’t you? The fact that something is entirely yours and yours alone. And all for the price of a couple of cans of spray paint!


Leave a comment